Adventures in Acid Death Fantasy - Part 2
This adventure will use The Oracle’s Decree, albeit from the Trilemma Adventures Compendium. I made some monster conversions in advance and decided how the traps would be interpreted in Troika!, as the adventure itself is system agnostic. There’s a B/X bestiary for Trilemma that I use as a starting point, then go through OSR to Troika! Creature Conversion by Xaositects.
In the desert, I’ll roll 2x/day on the wilderness table from the adventure. Each member of the expedition (including animals) requires 1 Provision per day. If needed, anyone can spend half a day and Test an appropriate Skill in the desert to forage; on a success, 1d3 Provisions.
In this session, the block quotes are from ChatGPT (with my edits and corrections as needed) unless otherwise noted. I also cut the last paragraph from each block quote, as it’s usually a summary of the situation and a weirdly hopeful reminiscence.
Preparation
Zamug spends his days and nights in Shurupak quietly, avoiding any unnecessary attention. He keeps to himself in his modest inn room, venturing out only to purchase food and other necessities from the market. The city is full of life, with various sights, sounds, and smells filling the air, but Zamug remains focused on his goal of staying out of trouble and preparing for his next mission.
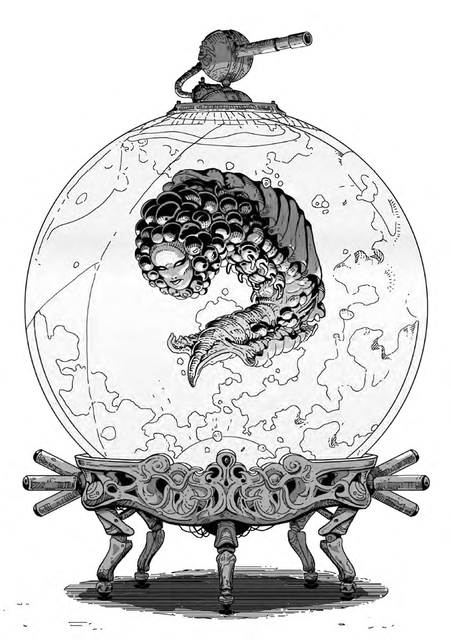
Interior: the throne room of a Freshwater Grub
Zamug enters the dimly lit room, the air thick with the scent of incense and the sound of soft music playing in the background. Svell, his Freshwater Grub patron, sits within his Aquarium-Throne, surrounded by several armed guards. The powerful figure regards Zamug with a shrewd eye before beckoning him closer.
“Zamug,” Svell says, his voice low and smooth, “I have a new mission for you. There is a lost fort in the desert, Pelaago. It is said that within its walls lies a map of water sources that I require.”
Svell leans forward, his eyes gleaming with avarice. “Your task is to find this fort and retrieve the map. There may be others looking for it, so be cautious. I hear there are Heelan bandits in the area, so watch your back.”
Zamug nods, his expression serious. He knows that failure is not an option when it comes to Svell’s missions. “Understood,” he says, his voice firm. “I will do what it takes to bring back the map.”
Svell nods, satisfied. “Good. You have proven yourself reliable in the past. Do not disappoint me this time, Zamug.”
Zamug heads to the marketplace to find a suitable guide for his journey into the desert. After some asking around, he meets a grizzled desert dweller named Shulgi. They strike a deal, and Zamug pays him upfront for 30 days of service, plus a bonus if they return early. The two of them ride on Zamug’s Sprinting Beast mount, Aea, who moves swiftly across the desert terrain. The journey will be grueling, but they are well-prepared, with plenty of provisions and supplies.
Wilderness Exploration
The expedition leaves Shurupak. The adventure includes a wilderness encounter table “every 3 leagues” in the book or “every 12 miles” in the PDF. As noted earlier, I decide this means twice a day, and I’ll roll until they encounter the fort.
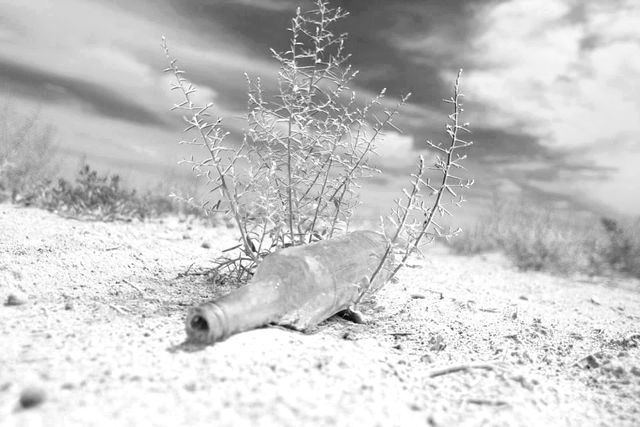
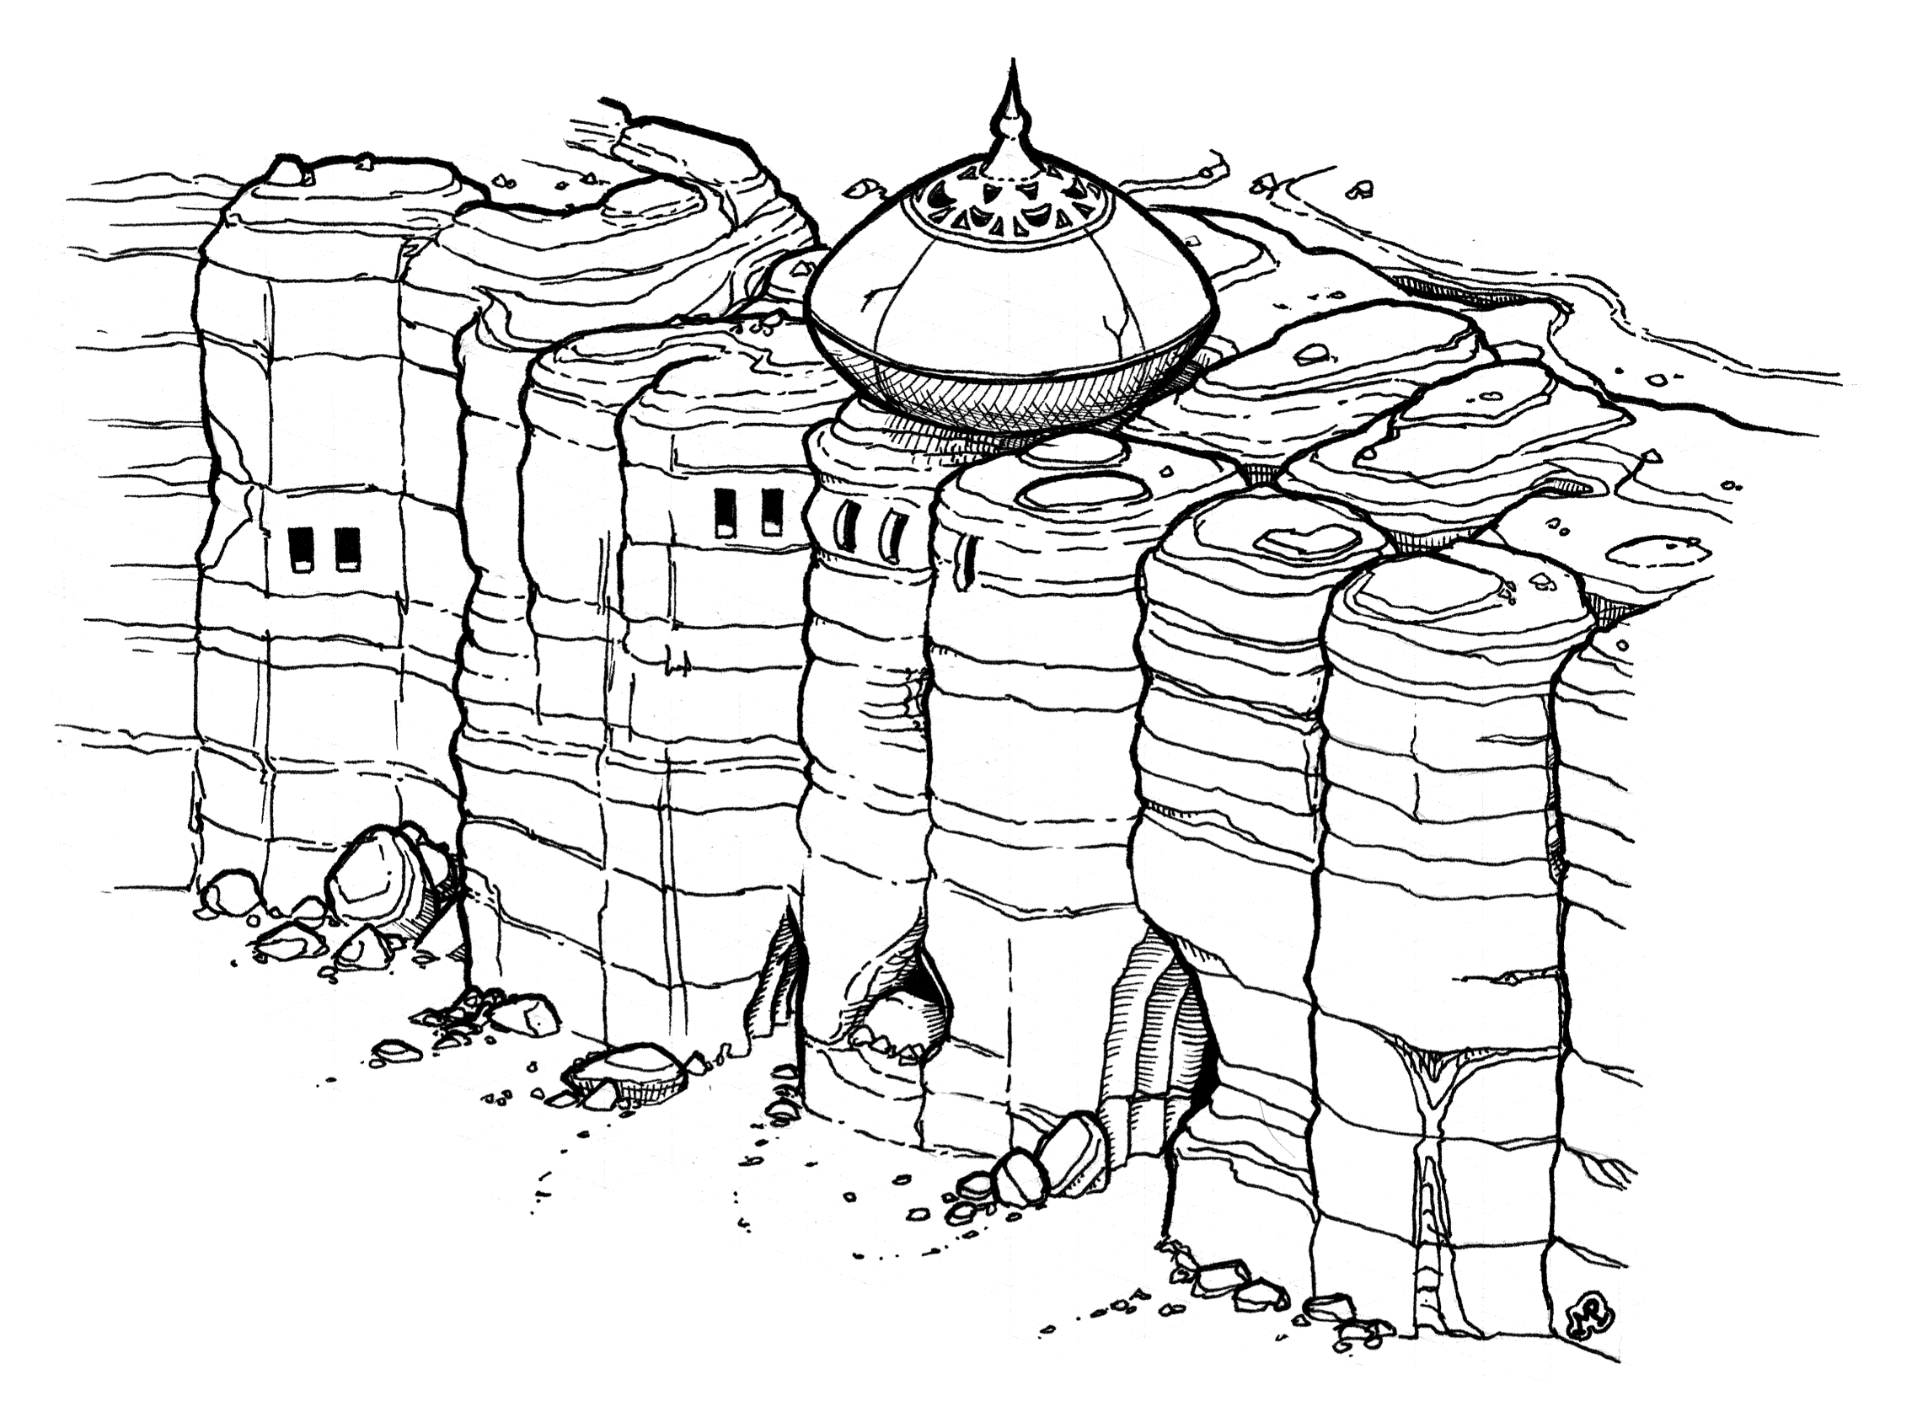 Image by Michael Prescott
Day 1 AM
Leave Shurupak. Field of sand domes: “thin, brittle crust over brackish water”, somewhat like quicksand but a little harder on top. Shulgi tests Skill (Desert Survival) to notice and avoid: success.
Zamug and Shulgi leave Shurupak and venture into the unforgiving desert. As they travel, they come across a field of sand domes, which appear to be a thin, brittle crust covering brackish water. Zamug knows that this is a dangerous area, as the crust can give way beneath their weight, causing them to sink into the water and become trapped.
Shulgi tests his Desert Survival skill, carefully navigating the treacherous terrain. He keeps a watchful eye out for any signs of instability, and expertly guides them through the field atop Aea.
Day 1 PM
Encounter with rag-rock hermit, who wants to gamble in exchange for secret of “drinking dust”. Zamug tests Luck: success. Secret is to dance with sand sprites, who’ll magically quench thirst. Also asks for a favor: slay Nirsiesel, the warlock of Pelaago. Zamug agrees; the group camps here for the night. Consume 3 Provisions.
As Zamug and Shulgi continue on their journey through the desert, they come across a ragged hermit perched atop a spire of rock. The hermit offers them the secret of “drinking dust” if they can beat him at a gambling game. Zamug tests his luck and manages to win the game, despite the hermit’s cheating with his platinum Vinteralf luck medallion.
The hermit shares the secret with them, revealing that the key to drinking dust is to dance with the sand sprites, who can magically quench thirst. However, the hermit also asks a favor in return: to slay Nirsiesel, the warlock of Pelaago.
Zamug agrees to the hermit’s request, as this likely is in line with what he’ll need to do in any case. The group sets up camp for the night, consuming three provisions to sustain themselves.
Day 2 AM
Encounter sand domes again; success in avoiding.
The next day, as Zamug and Shulgi continue their journey towards Pelaago, they come across another field of sand domes. While mounted on Zamug’s Sprinting Beast, Aea, they are able to traverse the area with greater ease.
Zamug and Shulgi work together to avoid any unstable patches of sand, keeping their mount moving swiftly across the terrain. Despite the dangers of the sand domes, they are able to navigate through without incident.
Day 2 PM
Encounter the Buried Oracle. The group finds a field of dried dung and scraps of book leather. Test Luck not to awaken the Oracle: success. This appears just to be a mysterious encounter, but it’s not what Zamug is looking for so they move on, then camp and consume 3 Provisions.
As Zamug and Shulgi continue their journey through the desert, they come across a field of dried dung and scraps of book leather. Unbeknownst to them, an Oracle in the form of a giant toad sleeps beneath the sands. Their luck holds and the group successfully avoids awakening the Oracle. This field of dung and book scraps is not what they are looking for and so they decide to move on, continuing their search for Pelaago.
Day 3 AM
Encounter d6 = 6 sand sprites as described by the hermit, whorls of dust. Zamug has learned the secret, to dance with them. The quenching of thirst means the expedition will only consume 1 Provision (total) today. What service or token do they seek? OPSE Oracle says “Seek / Mystical” about “Knowledge / Physical”. Zamug directs them to the dung field with book scraps; perhaps that will satisfy their desire to seek knowledge.
As Zamug and Shulgi continue on their journey, they come across a group of sand sprites swirling in the desert winds. Zamug recalls the hermit’s words and knows that the key to quenching his thirst is to dance with the sprites.
He approaches them and performs the necessary dance, feeling a cool sensation wash over him as the sprites work their magic. Thanks to their help, the group is able to conserve their resources and consume only one provision for the day.
As the sprites disperse, Zamug asks if there is anything they seek in return for their aid. Not performing a small service or giving them a token of gratitude could be dangerous! ((The One Page Solo Engine suggests that they are seeking mystical knowledge.))
Zamug directs the sprites towards the field of dried dung and book scraps, hoping that it will satisfy their desire for knowledge. The sprites seem pleased with his suggestion and disappear into the desert winds.
Day 3 PM
d3 = 1 Heelan bandit. Test Luck to see if they notice our group: success. Zamug’s goal is to subdue and interrogate, not kill. He dismounts and Rolls Versus the bandit using Sneak to see if he can get close: failure, so no ambush. Bandit attacks with staff, deals 4 damage. Zamug counterattacks with sword but the bandit deals 4 damage to him again. Unfazed, Zamug continues the assault and hits. Test Luck for extra damage, success, deal 6 damage which is enough to defeat the bandit.
As Zamug and Shulgi continue on their journey through the desert, they come across a Heelan bandit. They test their luck and successfully avoid being noticed by the bandit, but Zamug decides that he wants to capture and interrogate the bandit rather than kill him.
Zamug dismounts from Aea and attempts to sneak up on the bandit, but he fails to get close enough for an ambush before the Heelan notices his approach. The bandit attacks with his staff, dealing 4 damage to Zamug. Zamug counterattacks with his sword, but the bandit is able to land another blow, dealing another 4 damage.
Undeterred, Zamug continues the assault and lands a successful hit. He tests his luck and is able to deal extra damage, ultimately defeating the bandit with a final blow that deals 6 damage.
As the bandit lies defeated, Zamug takes a moment to catch his breath and assess the situation. He knows that capturing and interrogating the bandit may provide valuable information that could help him on his mission. With this in mind, he binds the bandit and prepares to question him.
Interrogation for info on local dangers; on success, can roll twice and choose for the next wilderness roll. Success! Consume 1 Provision.
Day 4 AM
Roll twice, choose to encounter sand sprites again. They have visited the Buried Oracle! What did they learn? “Current Need / Social”. Having read the rest of the adventure, I decide they want to be carried to Pelaago and placed in the dry well, but they’ll need to be carried in jars of water. Can do! This also means the expedition can dance with them each night to quench thirst, so they only consume 1 Provision each day as long as they have the sprites with them.
As Zamug and Shulgi continue their journey, they come across the sand sprites once again. The sprites have visited the Buried Oracle and learned something valuable; now they have current need related to the history of their society.
The sprites reveal that they wish to be carried to Pelaago and placed in the dry well, but they will need to be carried in jars of water due to the curse that the warlock within has established. Zamug and Shulgi agree to this request, knowing that the sprites’ assistance in quenching their thirst will be invaluable during their journey.
With the sprites in tow, the group continues on towards Pelaago, dancing with them each night to quench their thirst and conserving their resources by consuming only one provision each day.
Day 4 PM
Heelan hunting party on the horizon, consisting of an elite proudskull warrior and six escorts. Test Luck: do they see Zamug, Shulgi, and Aea? No. Avoid, move on, find a camping spot. Consume 1 Provision.
As Zamug, Shulgi, and Aea continue their journey towards Pelaago, they spot a Heelan hunting party on the horizon. The party consists of an elite proudskull warrior and six escorts, and they appear to be on the hunt for something in the desert.
They’re relieved to find that the party has not yet spotted them. Zamug quickly makes the decision to avoid them and move on, finding a nearby camping spot to rest for the night.
Day 5 AM
Heelan bandits again, but this time there are two of them. Test Luck: success, avoid being spotted. Zamug only has 1 charge in his laser pistol today and decides to avoid the bandits. Possibility of information is not worth the risk.
As Zamug, Shulgi, and Aea continue their exploration of the desert, they come across a group of Heelan bandits. This time, there are two of them, and they appear to be more heavily armed than the previous bandit encounter.
Zamug assesses the situation and decides that the risk of engaging the bandits is too high. He only has one charge today in his laser pistol, and he knows that they cannot afford to waste it on this encounter.
Instead, he decides to avoid the bandits and continue on their search for Pelaago. While he knows that the bandits may have valuable information, he also knows that their safety and the success of their mission is more important.
Day 5 PM
Starsleigh (counts as Golden Barge). Approach and investigate. Test Luck to see how low it sinks when touched: not bad, still reachable if Zamug can find a way to recover it.
As Zamug, Shulgi, and Aea continue their journey towards Pelaago, they come across a mass of twisted, silvery metal in the sand. As they approach, they realize that it is a crashed Vinteralf zephyr-chariot that can take them not only across this world but into the humpbacked sky to other worlds.
The chariot whines, shakes, and sinks deeper into the sand as they touch it, but it doesn’t sink too far and remains partially visible. Zamug investigates the wreckage, intrigued by the potential value of the advanced Vinteralf technology.
As he examines the twisted metal, Zamug realizes that he will not be able to recover the chariot with his current resources. However, he asks Shulgi to record its location, knowing that it may be a valuable resource in the future if he can find a way to recover it.
Day 6 AM
Pelaago is found! As agreed, Zamug will enter alone. Leaves finery, disguise kit, camping stuff; takes exploration supplies.
Dungeon Exploration
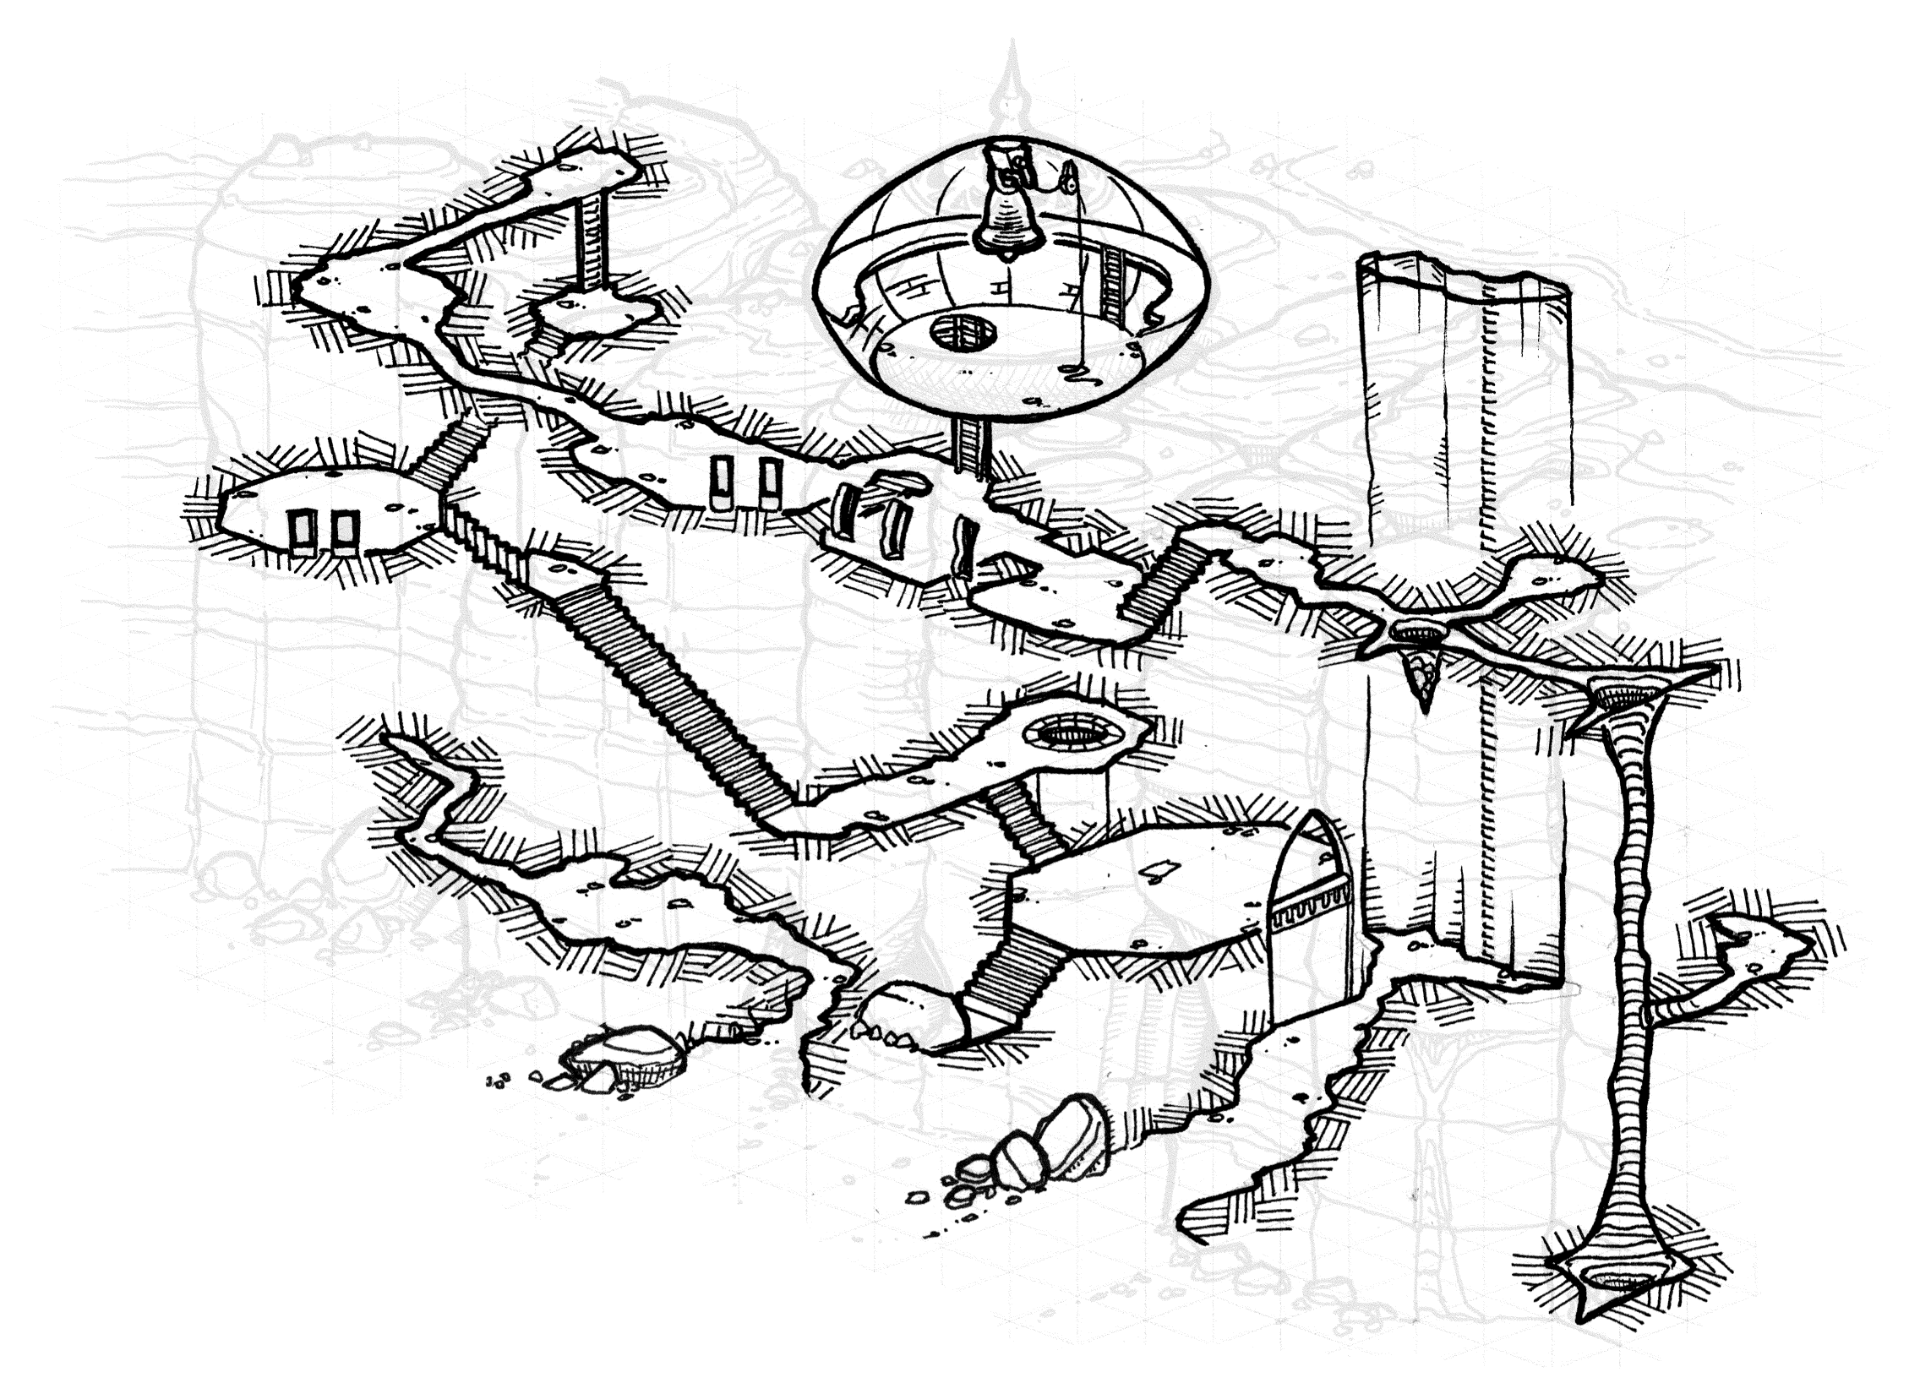 Map by Michael Prescott
As Zamug approaches, Nirsiesel is hurling bolts from the windows. Zamug tries to Dodge but fails and takes 7 damage while trying to enter the fort.
As Zamug approaches Pelaago, he sees Nirsiesel hurling bolts from the windows. Zamug tries to dodge the incoming attack, but unfortunately, he fails and takes 7 damage while trying to enter the fort.
Turn 1
Enters left door (A) since it’s smaller and hopefully less chance of trouble, easier to sneak. No bandits here. (I interpret the map as this part of A connecting straight to B). Before he enters the area fully, a trap goes off prematurely. d8 = 1 knee-high brass axe-golem, as gremlin.
As Zamug enters the left door of the fort, he hopes to avoid any potential bandit encounters and make his way to Nirsiesel without incident. However, before he can fully enter the area, a trap is triggered prematurely, unleashing a knee-high brass axe-golem.
Turn 2 - Combat
Round 1 has no action, as the trap went off too soon.
Round 2 starts with the little clockwork axe-gremlin attacking, but Zamug destroys it with his sword.
Both Zamug and the golem pause, neither in the optimal position for combat. However, the little clockwork creature charges forward, attacking Zamug with its tiny axe.
With quick reflexes, Zamug draws his sword and engages the golem in battle. Despite its small size, the golem could have done some real damage, but Zamug’s skill and experience win out. He destroys the golem with a well-placed strike of his sword.
Turn 3
Enters well chamber (B). Zamug realizes this is where the sprites want to go! Notes its location. No trap here. Does he take the stairs up (likely) or down? Goes up.
Upon finding the well chamber, he realizes that this is where the sand sprites had wanted to be placed. He notes the location of the chamber, knowing that he may need to return here later.
Fortunately, there are no traps in this chamber, and Zamug is able to proceed up the stairs without incident.
Turn 4
Upper left observation room. Trap is a brass orb that emits weakening rays, but it triggers prematurely and he just sees a flash. (If it had gone off correctly, he would have tested Dodge skill or taken 1d6 Stamina damage.)
As Zamug reaches the upper left observation room, he notices a brass orb in the center of the room. He realizes that this is likely a trap, and approaches the room with caution.
The trap is triggered prematurely, emitting a flash of light that could have sapped his stamina. However, he is able to avoid the full effects of the trap’s weakening rays and continues his advance towards Nirsiesel and the map.
Turn 5
Climbs to upper left room, no windows. Another axe-golem trap here, but it’s not armed. Since he knows he’s getting close back to the bell chamber or at least the area where Nirsiesel was watching from, he gets extra sneaky.
In the upper left room, he notices another trap that resembles the one he encountered earlier. However, he also notices that the trap itself is not armed and there is no little axe-golem in sight.
Knowing that he is getting closer to Nirsiesel and the potential dangers that await him, Zamug decides to be extra sneaky. He moves carefully and cautiously, doing his best to avoid any potential traps or hazards that may be waiting for him.
Turn 6
Enter room beneath Bell Chamber, where the warlock is waiting. Roll Versus with Sneak to get in ambush, success! Hitting someone unawares. Use Laser Pistol (2 shots today): hit! Deal 4 damage and enter initiative.
As Zamug enters the room beneath the Bell Chamber, he sees the warlock Nirsiesel waiting for him. He sneaks to get into an advantageous ambush position, successfully catching Nirsiesel unawares.
Zamug quickly draws his Laser Pistol and fires one of two shots available today, hitting the warlock and dealing 4 damage. Nirsiesel is caught off guard but readies himself to defend against the intruder.
Turn 7 - Combat
Warlock casts thunder to try to disorient and deafen Zamug, but he successfully Tests Luck and is only slightly shaken instead. Everyone around (heh) is impressed. Zamug takes aim, holds. He gets an opening and fires, hitting Nirsiesel and slaying him.
As Nirsiesel casts Thunder to try and disorient and deafen Zamug, the adventurer is only slightly shaken instead. Zamug remains focused, taking aim and holding his position until he sees an opening. When it presents itself, he fires his laser pistol with deadly accuracy, hitting Nirsiesel and slaying the warlock.
Turn 8
Enter Bell Chamber. A trapdoor to a spiked pit triggers prematurely. Contains 4d6 = 13 scrolls (random spells), 2d6 = 11 opals in satchel, a charioteer’s helm, and the map (quest item).
As Zamug enters the Bell Chamber, a trapdoor to a spiked pit triggers prematurely. However, he manages to avoid falling in and discovers a treasure trove containing 13 scrolls with random spells, a satchel with 11 opals, a charioteer’s helm, and the map he was sent to retrieve.
Zamug quickly grabs the map and the rest of the items before leaving the chamber.
Turn 9
Check A for bandits again, none, he’s through and can return to the camp. Fulfill promise to sand sprites (now water sprites) so they can lift desertification curse over time. This is likely to change the setting significantly!
He checks for any signs of bandits, but the coast is clear. He knows that he must make his way back to the camp and fulfill his promise to the sand sprites. What he does not know is that this will lift the desertification curse in this part of the wastes, creating new oases and water sources in the area.
Return to Shurupak
On the way back, they head to the starsleigh they found the previous day. In order to get there successfully, test Shulgi’s Desert Survival skill; on a failure, they’ll have to make an encounter roll first. Success! Zamug gives 4 opals (half a share) to his guide in addition to the pay from before. Does he want a ride back to Shurupak (unlikely)? Yes, in fact, he does.
Zamug turns in the map to his Freshwater Grub patron, Svell, who has unknown purposes for it. He receives 1000 silver pieces for his trouble, plus he’ll keep the rest of what he found in the fort.
With the map successfully retrieved and the desert curse lifted, Zamug and his guide Shulgi head back to the starsleigh they found earlier. Luckily, Shulgi’s Desert Survival skill helps them navigate the desert without any further complications.
Zamug is pleased with Shulgi’s services and gives him half a share of the opals they found, in addition to the pay he received earlier. Shulgi is grateful and agrees to ride back with Zamug to Shurupak.
Once back in the city, Zamug turns in the map to Svell, his Freshwater Grub patron. In exchange, he receives a hefty reward of 1000 silver pieces, as well as permission to keep the rest of the items he found in the fort. Zamug is satisfied with the outcome of his journey and the reward he received, but he can’t help but wonder about Svell’s true motives for obtaining the map. Nonetheless, he decides to put those thoughts aside and enjoy his success for the time being.
Other rewards
Rolling 13 times on the Random Spells table, he gets the following from his scrolls:
- Affix
- Banish Spirit
- Befuddle
- Cone of Air
- Ember
- Flash
- Jolt
- Jolt
- Languages
- Shatter
- Tongue Twister
- Tongue Twister
- Ward
This means he can cast each of them once (at +1 per Item usage), but he doesn’t know them for ongoing usage. He might be able to sell them but chooses not to.
His next quest will be to find a way to repair the damage to the Starsleigh, since it can’t fly north. Does that mean it can fly northeast or northwest, at least (even)? No, and it can’t go to other spheres yet either.
Zamug improves his Laser Pistol Fighting skill (to 2) but not his Sneak skill. Since he’s been so generous with Shulgi, the desert guide will spend a week attempting to teach him finer points of Desert Survival: success! Zamug now has 1 in that skill.
Wrap-up
I had a lot of fun converting the adventure to Troika!, and with so many random elements, it was still enjoyable to run myself through it the next day. I think the rest of this campaign will involve getting the Starsleigh repaired and flying again. From there, maybe Zamug will visit other spheres, or maybe that will be the end of this playthrough, depending on my mood and interest level at the time.