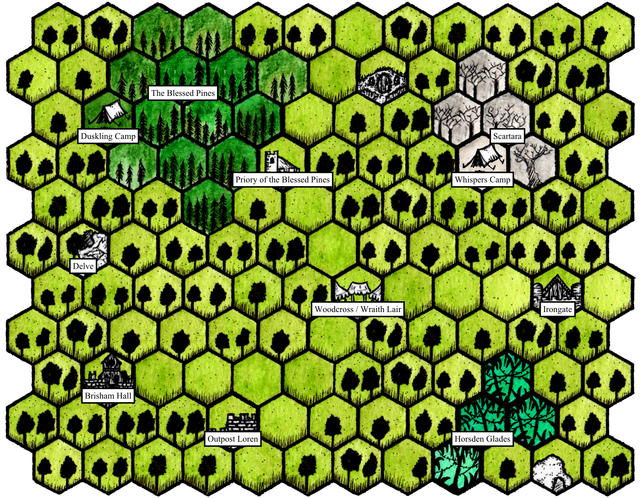
Brisham Wood - Campaign Turn 7
I finally get to experience some of the D&D-like bits of 5 Leagues From the Borderlands in this campaign turn.
Preparation Stage
Gunuert, the monk and healer, accompanied them all the way from the Priory to Woodcross, continuing to aid Chert with poultices and prayers. Between this and the extra week of rest, Chert is back at full health and in fighting shape.
As has become the Silver Hawks’ custom, they will cover their upkeep by helping the town guard for a night or two. It seems to have helped build some trust with the village authorities as well! In fact, Deegon (local elder) asks them to chase off some local trouble-makers as well. They agree, although first they intend to go take care of the local wraith before that.
While in town, they spend 5 gold on a “self bow” (short bow) for Tiffany so she has an option to fight at range. Melee can be absolutely brutal, so every enemy brought down at a distance is an enemy with less opportunity to hurt the heroes.
More officially, the town council informs them that a local is in need of rescue! There’s no shortage of work to keep Woodcross and the nearby folks safe, it seems. That’s for next campaign turn, though.
Instead, this time the group is going back for the monster lair (wraith), as this is the last opportunity before some itinerant knight does so. (They may be heroes, but they also want to grow their own reputation.)
Adventure Stage
Finding the lair requires an 8+ Scouting test, which the group promptly fails. However, Tiffany speaks up: “Did I ever tell you how I learned to do this?”. (I add this skill to her character and they’ll auto-succeed. This is an option usable only one time in a campaign.)
As an “aberration”, the wraith works slightly differently than regular enemies. When it takes a hit and would otherwise take a wound or become a casualty, it loses “Monster Points”. Once reduced to 0 MP, that’s when it’s finally destroyed. There are some other differences too, but that’s the main one here.
Lair assaults also work differently, even when they’re found. The warband sends in a single scout who tries to find the monster and lets the rest know when to come in and fight.
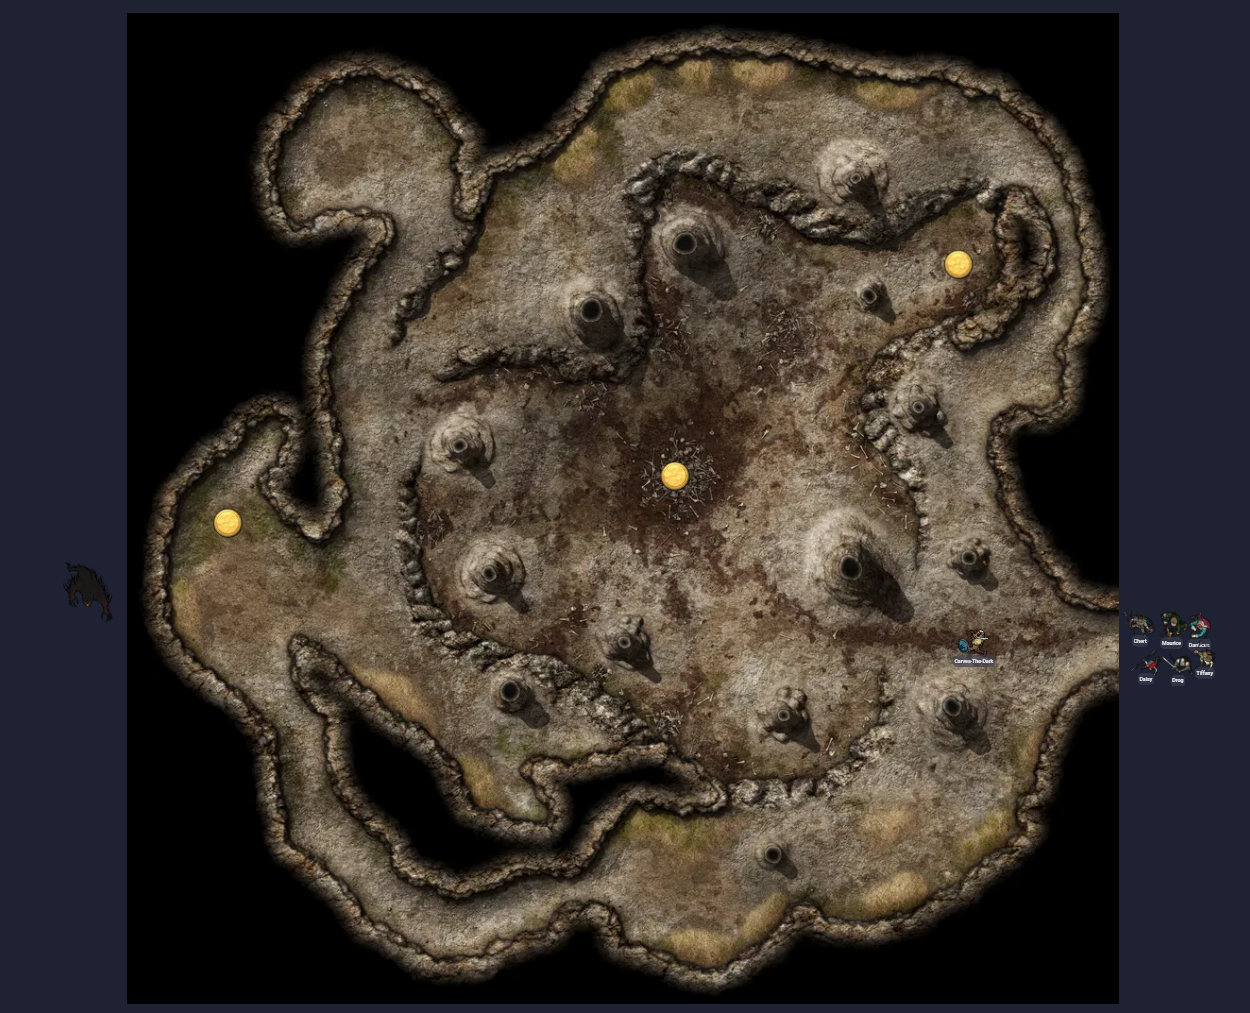
To set this one up, I’ll use an old Gabriel Pickard map I’ve had lying around a long time in the Monstrous Beast Lair set. For the wraith, I’ll also use the one from an Undead set by Devin Night.
(As usual, some of the links are affiliate links that don’t cost you anything but go towards buying more material I use in my blog posts here.)
 Monster Lair at the start
Scouting
Carves-The-Dark will perform the scouting role this time. The lair has only one entry point, on the east, and I have placed three “Curious Location” markers in the center and a couple of alcoves.
They move cautiously towards the central pit, filled with remains and debris. (Perhaps some of those are the remains of the person whose death formed the core of the wraith.) Once they reach it, they find some small glowing bits: wraith tracks. But the creature isn’t here, so CTD will keep looking, heading northeast where they see some possible indications of… something? Hard to tell from here.
And in fact, as they approach, they see the ethereal undead form of a wraith, somehow unaware of the fey-blooded presence! CTD quietly signals the others of their find. The others move in, taking up positions at a bit of distance that allows each of them to have melee support but have a bit of cover for starting with ranged attacks.
Turn 1
The initiative roll goes well and several warband members will get to act before the wraith can react. Maurice, Daisy, Chert, and Tiffany fire at the aberration; Maurice misses, but the others hit! In fact, both Daisy and Tiffany make solid shots that have the wraith on its last MP already.
But now the dreadful creature counterattacks. While Daisy and Carves-The-Dark both stand about the same distance away horizontally, she is up on top of a rise, so CTD is technically slightly closer. The wraith therefore rushes towards the fey, assaulting them with a horrifying scream. In a series of one-sided exchanges, CTD is wounded, stunned, driven back, and finally taken down as a casualty. (The combat is fast and deadly in this game!)
In response, Drog moves up next to Tiffany (who is quite close to the wraith) and tears into it. He’s unable to take it down, but he does drive it back slightly.
Turn 2
Daisy and Chert let fly from their longbows, but to no real effect.
The wraith now turns its malevolence on Drog, immediately hitting him (though not wounding). Its terrifying nature sends the former soldier fleeing, however. (The wraith has a trait that sends followers fleeing when they lose an exchange, which surprises me as it can be read as preserving them in situations like this.)
Before the rest of the warband can act, Maurice puts a crossbow bolt into the wraith and destroys it. The undead energies swirl and dissipate; the aberration will no longer haunt Brisham Wood.
Resolution Stage
Rewards for aberrations work slightly differently as well. The warband receives 2 total Adventure Points for defeating an aberration, plus another for the contract. That brings them up to 11.
Next, I check on Carves-The-Dark: they’re only knocked out, with no recovery time needed. This is quite a relief!
All heroes receive 2 XP, except CTD who receives 1. Maurice gets an advancement roll and chooses to improve his Combat Skill up to +1. Daisy does as well, increasing her Toughness to 4. Drog’s encounter with the wraith led to a flash of insight and he is now promoted to a full hero! As part of that, he also increases his speed to 6” (+3 on a Dash).
The aberration had a reward rating of 2, so the group gets three loot rolls and 2 extra gold and XP. They find a fine helmet and a fine self bow. This is effectively like “armor” for the items, allowing them to ignore the first time they would be damaged. They also find a large quiver, which allows the user to make one more shot when they run out of ammunition. With the 2 gold marks (plus 4 more for the contract), they’re at 11 gold. The extra XP gets distributed randomly to Maurice and Chert. In the debris in the central pit, they also find an extra short sword and self bow.
Settling back in at Woodcross, the local clergy are pleased with the result. They inform Maurice of another small task they’d like done: carrying a letter from Brisham Hall to the Priory of the Blessed Pines. It’s not urgent, though.
Wrap-Up
I’m not sure I handled that ruling for the follower correctly. If I run into a monster with that trait again, I might only have the follower flee at the end of the combat (assuming they lose an exchange but survive).
Fighting a monster went surprisingly easy, otherwise. Maybe that’s a result of catching it unaware and stacking up ranged attacks, but I thought it would drag out much longer than that. Perhaps the Silver Hawks should go hunting more monsters!

