Brisham Wood - Campaign Turn 13
I’ve been having so much fun with the crafting and painting that I keep forgetting to post battle reports / blog posts here! This is a bit of catch up of my 5 Leagues From the Borderlands campaign. (affiliate link)
Preparation Stage
The warband is now in Brisham Hall, the village named after the ancient manor at its center. The locals are fully engaged in farming work right now, and they’d like some help in the fields, but we’ve got bigger tasks to do. Carves-The-Dark does spend some time training, though, feeling a bit out of practice, and Maurice sells a couple of the staves they’ve recovered for some gold marks.
This turn, the group will travel to the house of a wise woman who can help them with their quest for Gunuert, though she lives in the edges of the forest.
Adventure Stage
On the way to visit the wise woman, though, the Silver Hawks are waylaid by roving fiends again!
Flocks of humanoid beasts with rudimentary intelligence, they live off carcasses and what they can kill with their clawed hands.
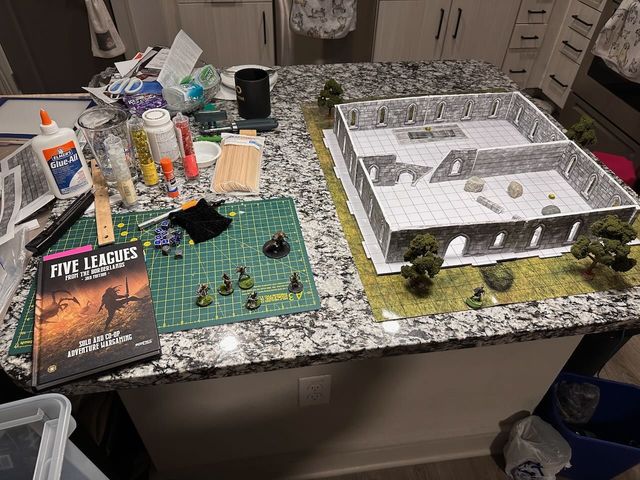
These read to me like ghouls, except that they aren’t really undead. Regardless, I grabbed a couple of ghoul line art illustrations from Google Images, then made those into paper standee miniatures. I also used an old D&D skeleton miniature for the captain to reflect its higher armor and skill level. All told, this turns out to be about a dozen enemies!
For the actual battle field, I ended up building the edge of a farm with a road running through it. The fake moss I got at the craft store was not a good choice, as it shed far too much for my (or my spouse’s) liking. After building some truly bad cabins by hand, I eventually just bought one, though the wooden fence and road strips were my own (also bad) creations. Ultimately, most of the terrain here turned out to be stuff I bought rather than built, but this continues to be a learning journey for me.
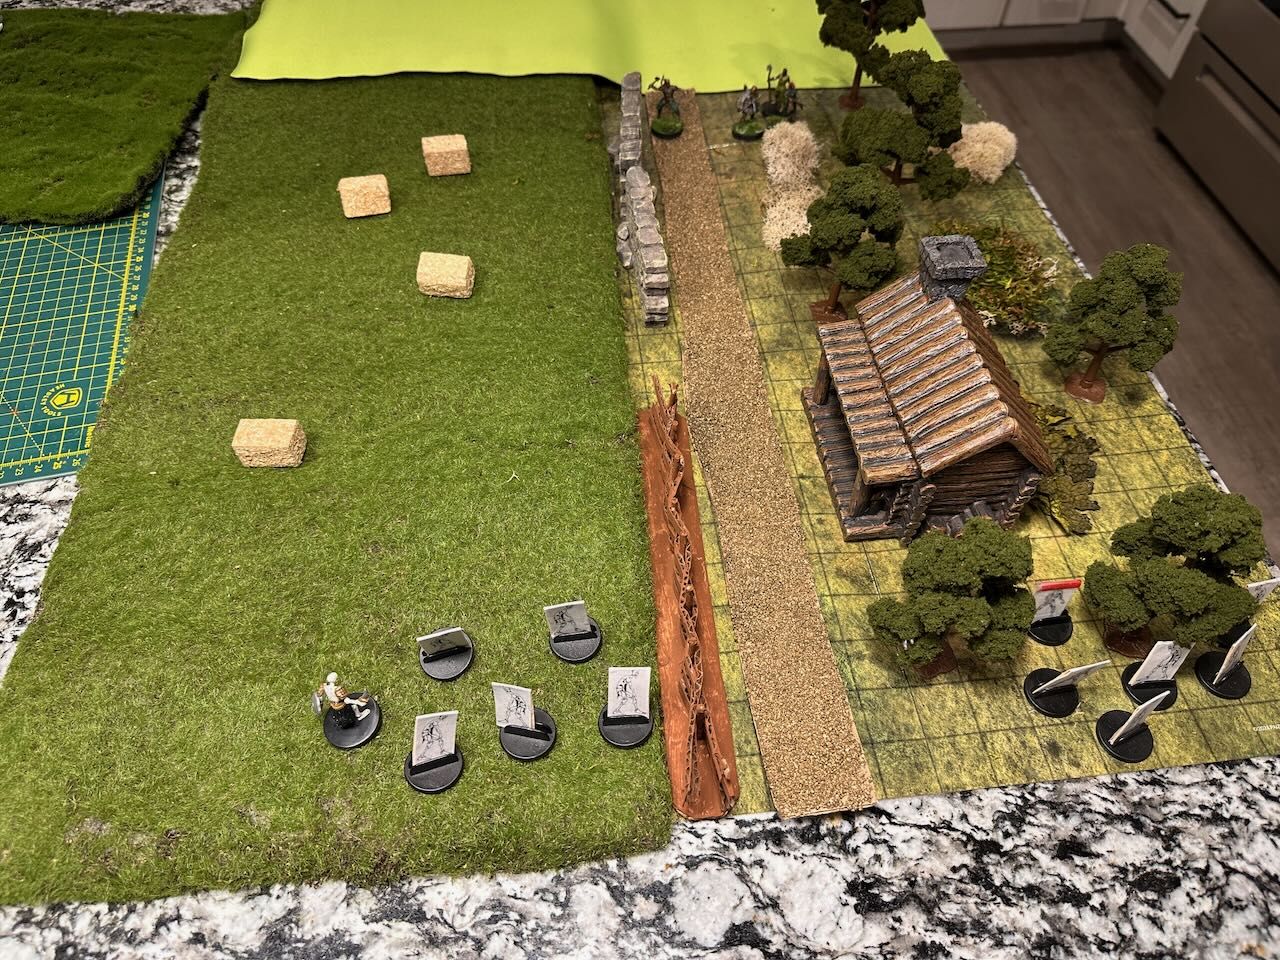 Set up outsid the Wise Woman’s cabin
The big field on the left is actually full cover and difficult terrain, representing a corn field or similar with plants grown high enough to conceal anyone in it. There are a few hay bales there are as well that are blocks (can’t be moved through).
For this kind of defensive battle, after setting up, the enemy makes some infiltration moves in an attempt to close the distance to the warband. They indeed manage to get quite close before detection!
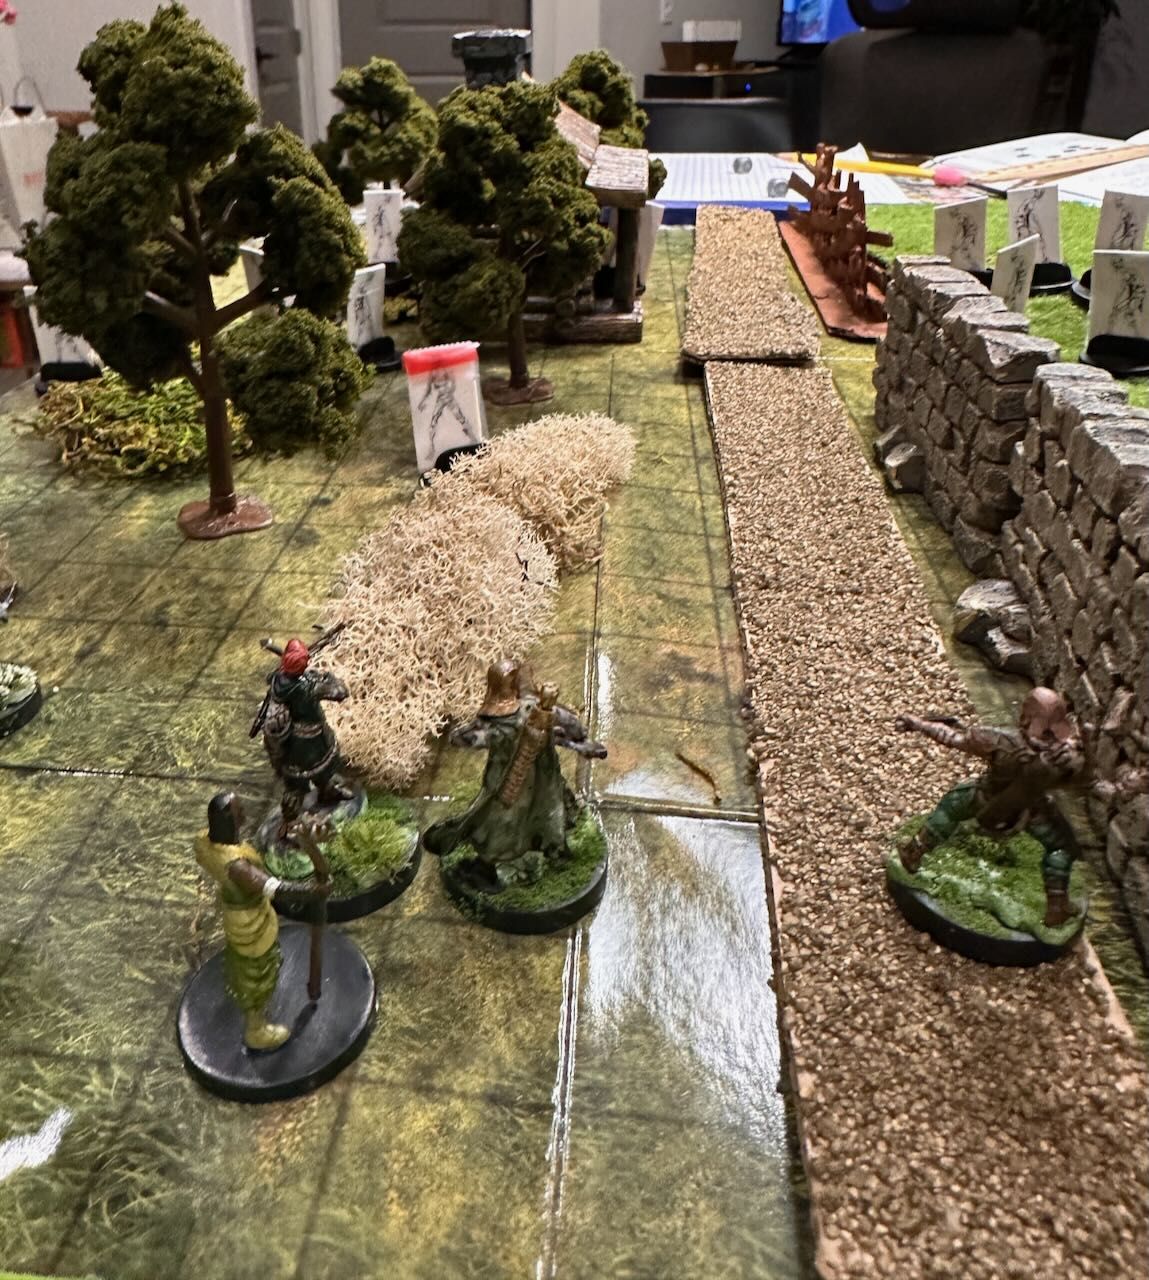 Starting the fight outside the wise woman’s cabin
Turn 1
Daisy and Carves-The-Dark pull back rather than allow themselves to be singled out. Daisy fires at one of the tougher enemies but only stuns it as the fiends all advance. Chert also manages to put an arrow into that enemy that can’t get through the armor.
Turn 2
With coordinated volleys, Maurice, Daisy, and Chert take down that particularly tough fiend and one of its compatriots. Another fiend reaches CTD, but the fey-blooded warrior repels the assault and forces the enemy back, while the others continue their implacable advance. Danticus and CTD fight forward, eventually slaying this fiend that has gotten ahead of the others.
Turn 3
Daisy misses with the last of her arrows and draws her war spear in preparation for a tough fight. A fiend rushes CTD who parries the attack, and again, and again! They are driven to their knees and stunned by this relentlessness but eventually push the enemy off of them. Several fiends charge Daisy and Maurice, who slay three of them with little difficulty. Carves-The-Dark and Danticus continue to counter-attack with little result, although one of the fiends eventually turns and flees upon seeing the ease with which the warband slew some of these enemies.
Turn 4
Daisy charges up to one of the enemies that has come close and drives it back, before eventually one comes around the field wall and is duly brought down for its trouble by Chert. The enemy captain also tries its luck against Chert; the zealous warrior wounds the captain. Unfortunately, as the other fiends advance, the captain’s wound heals in a swirl of dark energy.
Turn 5
With one side of the enemy assault completely eliminated just in time, the Silver Hawks focus their attention on the captain and the rest of the fiends that flanked them from the field. Daisy is an immovable fortress as the captain and two more fiends charge her, each to be defeated in turn, one after the other.
Finally, the remaining fiends turn and run, shrieking.
Resolution Stage
Reaching the wise woman’s cabin, they find her unharmed and grateful for arriving just in time. She offers a respite for them to rest and heal from their wounds - in fact, this is the major part of her gift, as she heals Tiffany entirely and gets Drog nearly on his feet. In long discussions, she tells them more about the ritual that must be performed to complete their quest.
Maurice searches the remains of their foes, finding 5 gold marks and a Delver’s Kit. The wisdom of their hostess grants Danticus +2 skill as a Scholar, and Carves-The-Dark also improves their combat skill.
Finally, in a dream, Maurice learns of a monster that emerges from an arcane fog somewhere in Brisham Wood. A troll has crossed the veil between worlds and must be found and slain to protect the people here.
Wrap-Up
Making terrain is hard. It’s way harder for me than painting miniatures, but I’ve started to find which materials I can work with (cardboard and glue) as well as getting a better sense of proportions. The paper miniatures worked fine, although perhaps I could do a better job attaching them to the Pathfinder Pawn bases I have for them.
Also, the dice and the rules combined to give me a very cinematic experience, whether it was Carves-The-Dark defending against an enemy attack three times in row with their shield or Daisy easily dispatching several fiends in a row!