One-Hour Wargames: Ancient Campaign - Battle 2
After a break for the holiday, I have returned to my little wargame. As previously noted, this is a small campaign in a fictional “ancient era” setting using the One-Hour Wargames rules.
The powerful but evil Polonquitix Empire is struggling with a rebellion organized by the plucky Nalgatorios, who have infiltrated into otherwise-secure territory. In this scenario (4 - Take the High Ground), the rebels are attempting to raid a supply location on a strategic hill. The side that controls the hill at the conclusion of the game is the victor. (Technically, this could lead to a draw, but I suspect that will not be the case after a full 15 turns!)
Order of Battle
- Polonqiutix Empire: 3 Infantry, 2 Archers, 1 Cavalry
- Nalgatorios: 3 Infantry, 1 Archer, 2 Skirmishers
Originally, I rolled the same composition for both, but OHW indicates that we should reroll if this happens. (While I have built this mini campaign around a narrative, I had previously decided not to simply use the same Nalgatorio forces, assuming that this army is actually the result of several groups joining up at the target location.)
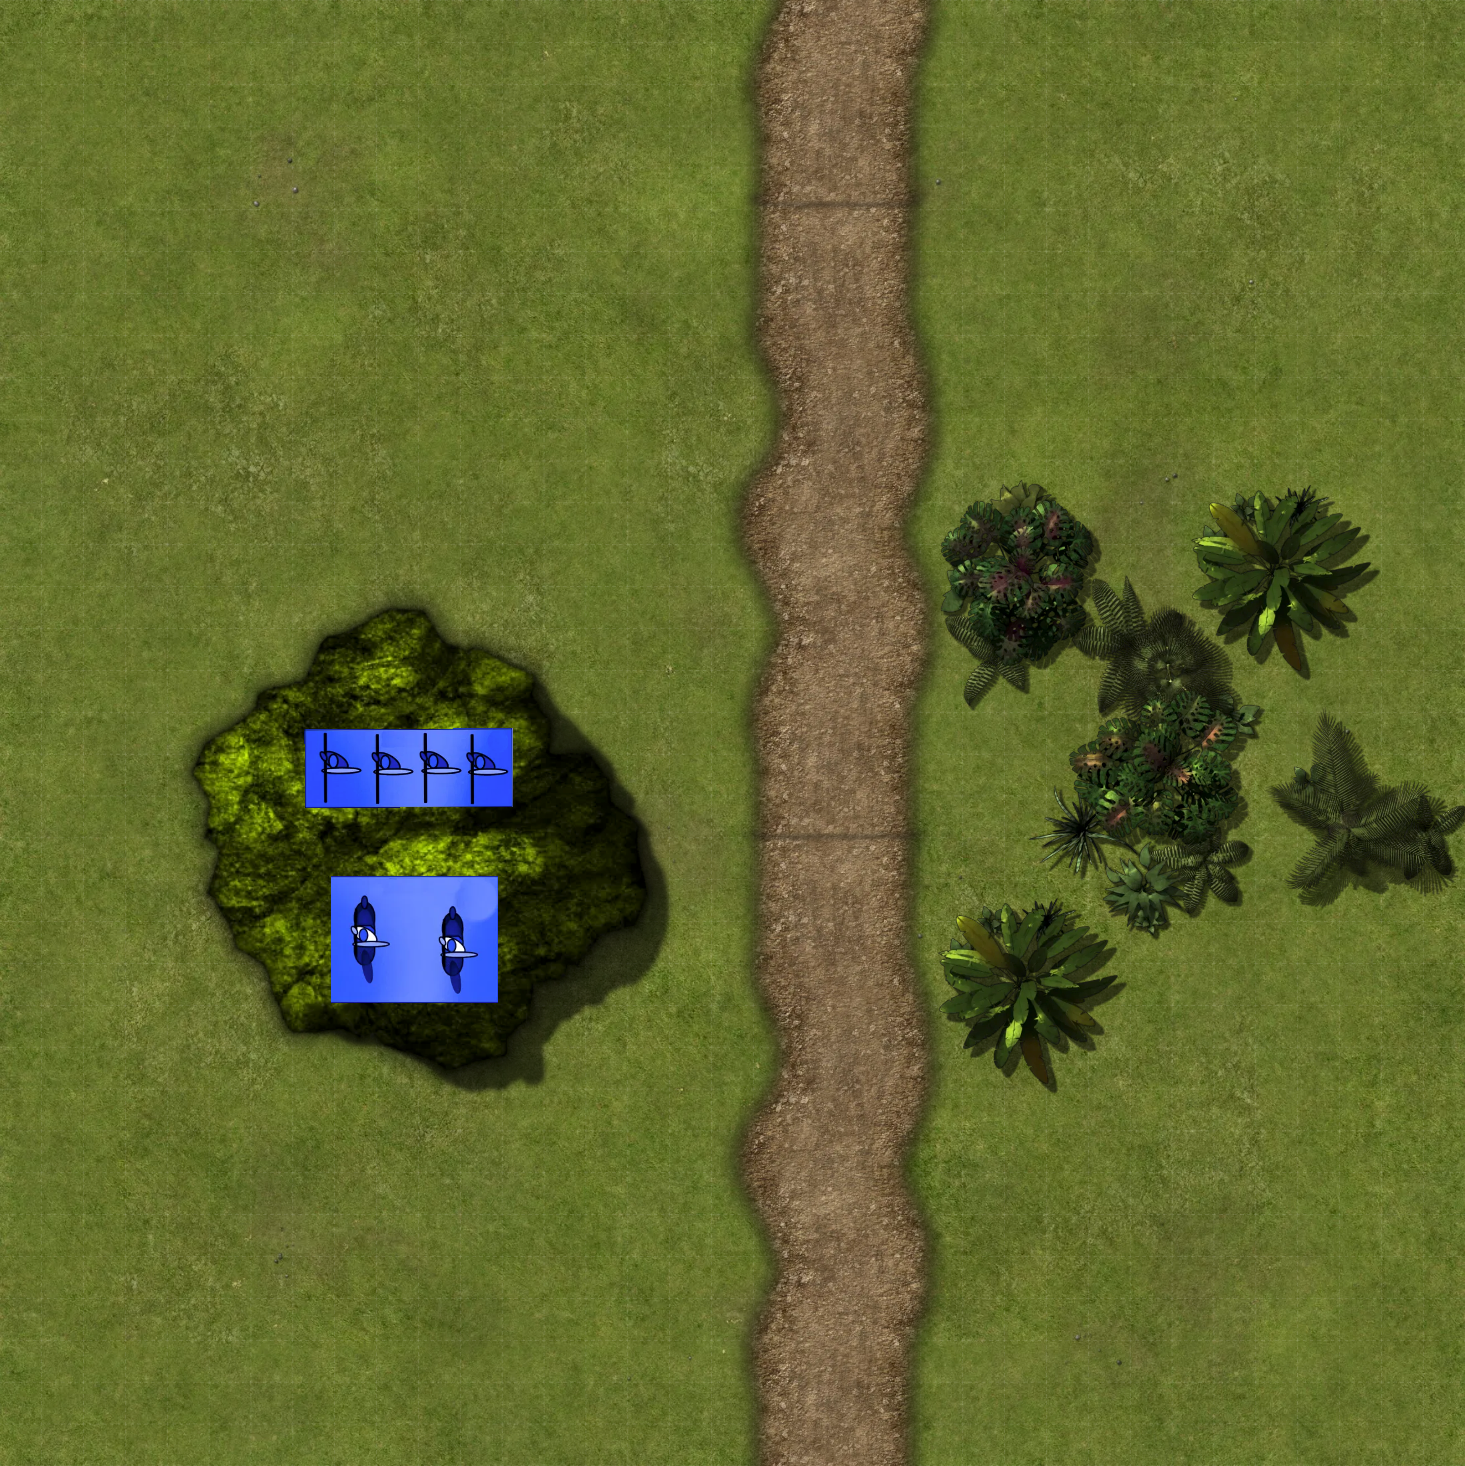
The Empire deploys 2 units on the hill, facing south: a Cavalry and an Archer. The Rebels will arrive on the road from the south at the start of the first turn.
Rules Notes
After a lot of thinking, I have decided to reverse my previous ruling about flanking and pivoting: flanking an enemy should not be actually worse than hitting them head-on. Therefore, a unit that is attacked from its flank may pivot to face the attack (if it is not engaged on its main front) but that pivot will necessarily allow the attacking force to finish its charge and engage it, assuming the attacker has enough movement to do so.
Map Notes
Note that only Skirmishers may enter woods in the Ancient Era, which lie on the eastern central portion of this map. Defenders in the woods or on the hill take half the number of hits in melee, and in the woods that applies to missile attacks as well.
This time, I am denoting each unit with a number. The number is just an identifier; I will be tracking each unit’s hit total separately (not on the map itself).
I’m also straightening out the road to avoid some of the idiosyncracies from last battle, because units are generally not supposed to pivot during a move (only before or after in various circumstances). Otherwise, I am generally using the same map elements as before. (I did recolor the units, though, so the Imperials look a touch less garish).

Battle
Set up with Imperial Cavalry and Imperial Archer 1 on the hill.
Turn 1: Empire
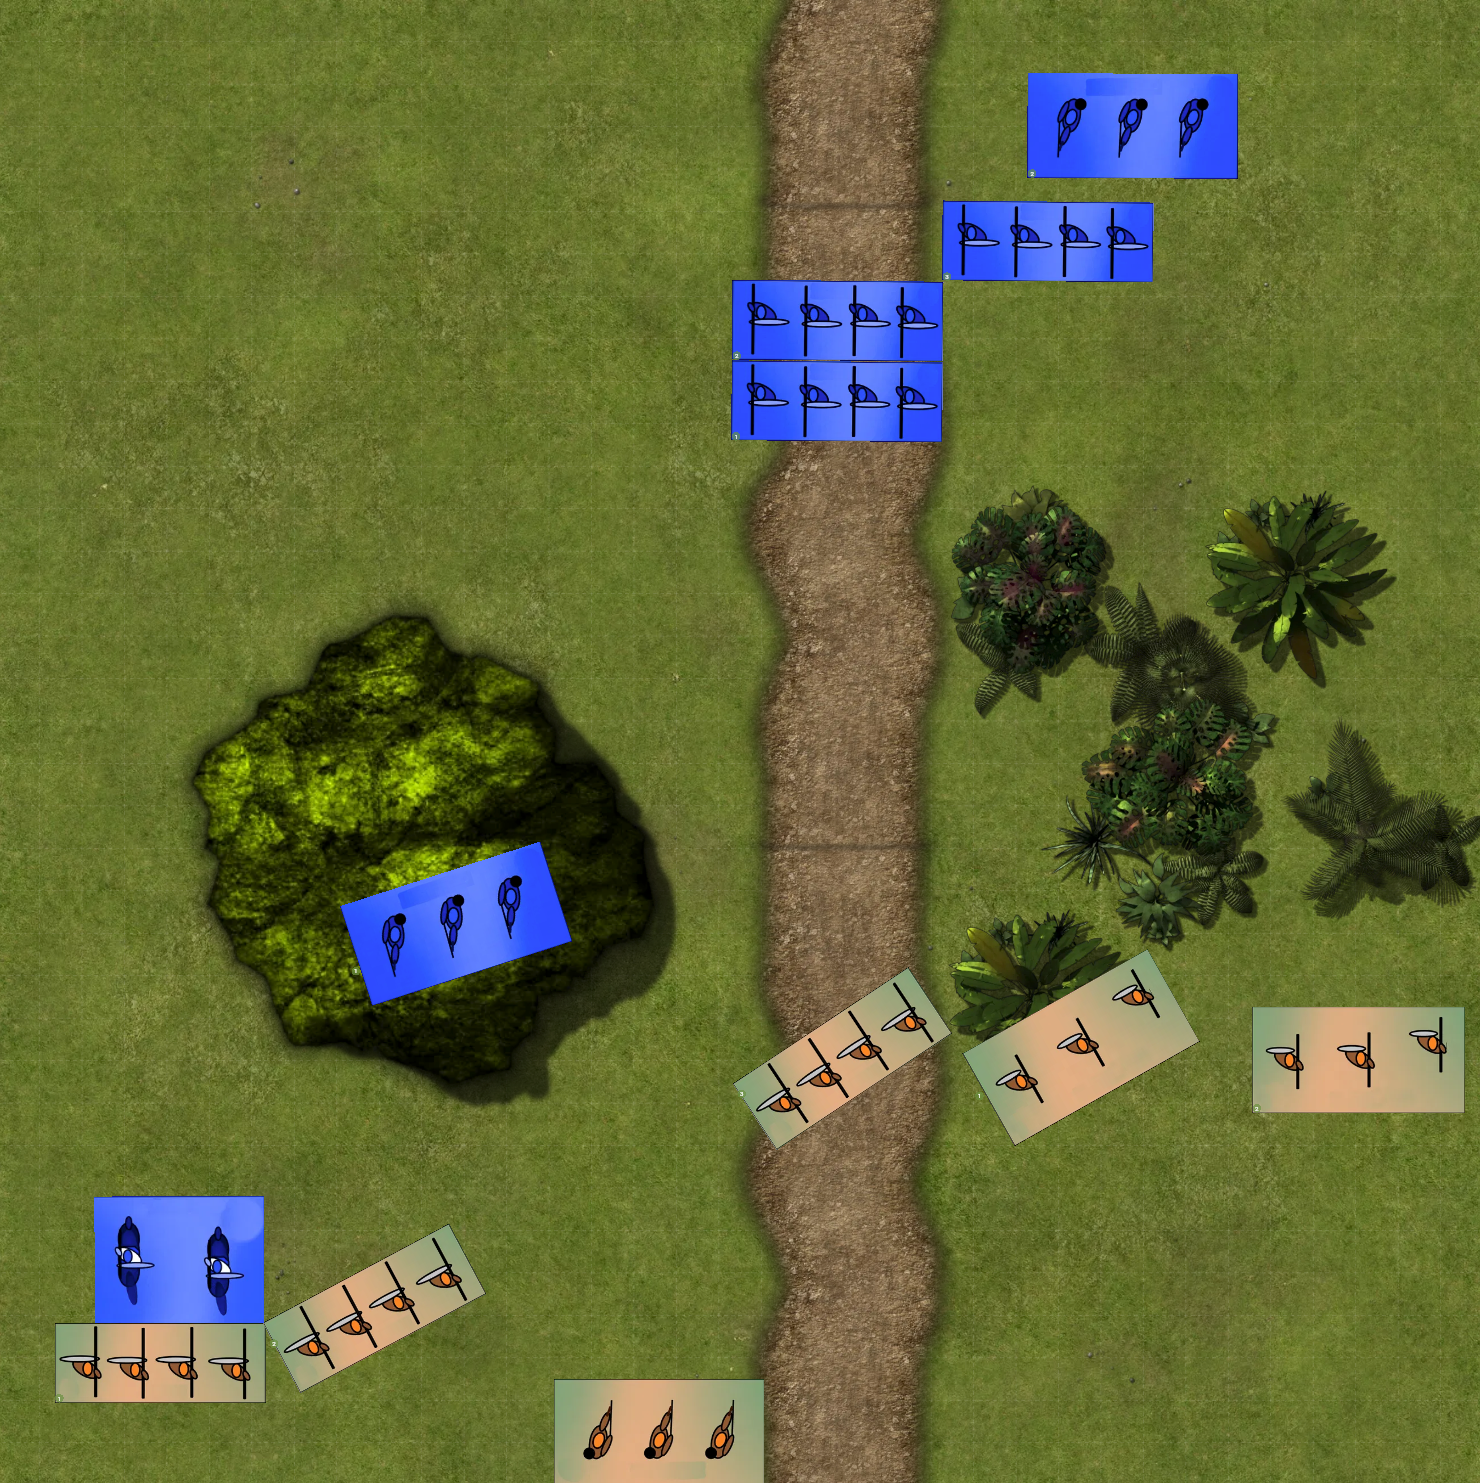
The scenario specifies that the Empire go first in each turn. They are aware that the Nalgatorios are about to arrive. Therefore, they will position so that the Cavalry can attempt to charge the enemy’s flank. The Archers remain on the hill, hopefully out of the range of any enemy charge but within their shooting range.
Turn 1: Nalgatorios
At this point, their entire force arrives on the southern table edge. From west to east, they have: Infantry 1, Infantry 2, Archers, Infantry 3, Skirmishers 1, Skirmishers 2. This will hopefully allow the Skirmishers to take advantage of their ability to move into the woods while giving Infantry 3 the opportunity to move quickly down the road for the inevitable Imperial reinforcements.
Now that they’ve arrived, they can actually move. First, Infantry 1 will charge the Cavalry to negate their advantage. Infantry 2 will also move, preparing to flank the Cavalry on the next turn. Infantry 3 runs up the road so that they can try to charge the Archers next turn. The Archers remain where they are (so that they can shoot in the next phase). Both Skirmishers advance towards the woods on the eastern edge of the map, though only the first unit succcessfully enters cover.
The Nalgatorio Archers now fire on their counterparts up on the hill, which gives no defensive bonuses against missile attacks. Therefore, they do d6 = 2 hits.
In hand-to-hand combat, Infantry 1 roll d6+2 = 7 hits against the Imperial Cavalry. Perhaps this was a tactical error by the Imperial commander not to preserve his mobility until the enemy actually appeared.
No other combat takes place this turn.
Turn 2: Empire
At the start of this turn, the other 4 Imperial units arrive on the northern table edge, “either on or east of the road.” The three Infantry units are on the road or just to the east, with Archers 2 in the northeast corner.
Infantry 1 will be assumed to be using the road first and they’ll use it to the fullest, moving their entire allowance (9” including the bonus). Infantry 2 is directly behind them on the road. Infantry 3 moves a bit slower on the field, but they won’t be able to enter the woods later anyway. The Archers are much too far out of range to launch a volley, so they will also move behind the Infantry for protection.
Archers 1 can now volley, and they will attempt to support their Cavalry by shooting at Nalgatorio Infantry 2 (attempting the flank maneuver), inflicting d6/2 = 3/2 => 2 hits.
The melee continues from the previous round as the Cavalry engages Infantry 1 on their front, which yields d6/2 = 2/2 = 1 hit on their opponent.

Turn 2: Nalgatorios
The Nalgatorios will complete their flanking maneuver onto the Cavalry. There’s a significant chance that unit will be eliminated later. Infantry 3 charges the hill but will be unable to reach the Archers there. Neither Skirmisher unit can throw javelins yet, so they will get into cover to reduce the possibility of attacks from the enemy Archers and prevent the Imperial Infantry from charging their positions.
Before the melees are resolved, the Nalgatorio Archers volley once more at the enemies on the hill, which gives them another d6 = 1 hit only.
At this point, hand-to-hand combat can begin. Infantry 1, already facing the Cavalry head-on, fights forward and gives them another d6+2 = 5 hits. Infantry 2, on the flank, then deals d6*2 = 6 hits, which reaches a total of 18 (more than the threshold of 15 to eliminate a unit). An early victory for the good guys… but there’s a lot of fighting left to determine who will control the hill at the end.
Turn 3: Empire
The defenders have their work cut out for them, but they have a few advantages in terms of holding the hill and the road. Infantry 1 again runs at full speed, and Infantry 2 is hot on their heels. Infantry 3 advances to the southwest, reaching the road, and Archers 2 stay behind them, hoping to be in range to shoot something soon (unlikely for Turn 4). Archers 1 is about to get flanked on the hill but they don’t have many options: they could retreat, leaving the enemy in charge of the main objective, or they could try to charge the enemy infantry. Neither of those are as productive as firing their bows, however.
Which is what they’ll do now, loosing arrows at the approaching enemy and thus inflicting d6/2 = 1/2 = 1 hit on Infantry 3. No hand-to-hand occurs this time.
Turn 3: Nalgatorios
The Rebels’ morale is up from eliminating an enemy unit, so they’ll immediately advance on the hill with Infantry 1 and 2. Because of the angle of the pivot, though, they are unable to actually charge the Archers on top of it. Infantry 3 will have its rear or at least side exposed in the next turn, but that can’t be helped until these Archers are dislodged, so they charge.
Rebel Archers fire once more on the hill, rolling d6 = 3 hits on the Archers there. Skirmishers 1 and 2 throw javelins at Imperial Infantry 1 from the cover of the woods for (d6-2) + (d6-2) = 3 + 1 = 4 damage! (I see a potential problem with the rules here: the Imperials have no units that can enter the woods, so if they end up losing their Archers, that could lead to a stalemate. I won’t worry about that unless and until it becomes an issue).
Now for the melee, in which Infantry 3 fully engages the Imperial Archers 1 and rolls (d6+2)/2 = 7/2 = 4 hits. This is not enough to elimiate them (although it’s actually the most they could do in these circumstances). That’s what happens when the enemy has the high ground.
Turn 4: Empire
Finally, they can strike back. Imperial Infantry 1 charges into the flank of Nalgatorio Infantry 3, trying to eliminate the pressure on their Archers 1. Infantry 2 will move into the shadow of the northern hillside, and Infantry 3 will move directly west to stay out of range of the Skirmishers as well as try to secure the western flank. Imperial Archers 2, then, will move within range of the hill, but probably not enough to hit much. They don’t want javelins sticking out of their bodies either, though.
In hand-to-hand combat, Archers 1 and Infantry 1 will tear into Nalgatorio Infantry 3, although the defenders’ armor and position on the hill helps them somewhat. The combined assault thus does d6/2 + d6+2 = 1/2 + 5 = 6 hits, as the flanking and armor cancel each other out.
Turn 4: Nalgatorios
Infantry 1 moves to the west side of the hill, while Infantry 2 can now pivot to charge up the hill to flank the Archers defending it. Infantry 3 is pinned for now. Skirmishers 2 advance carefully, staying in the woods but turning to get a shooting angle in the next turn.
The rest of the missile troops remain in position and let fly, both at Imperial Infantry 1. This is d6 + d6-2 = 1+3 = 4 hits on them.
In hand-to-hand combat, first Infantry 2 attacks the Archers on their flank, negating the hill defensive bonus, to deal d6+2 = 8 hits. At the same time, Infantry 3 attacks the Archers on their front for another (d6+2)/2 = 3/2 = 2 hits.
The archers are eliminated, and (for the moment) the Nalgatorios have sole possession of the hill. We don’t expect that to remain through the next turn, although at this point they have a significant advantage.
Turn 5: Empire
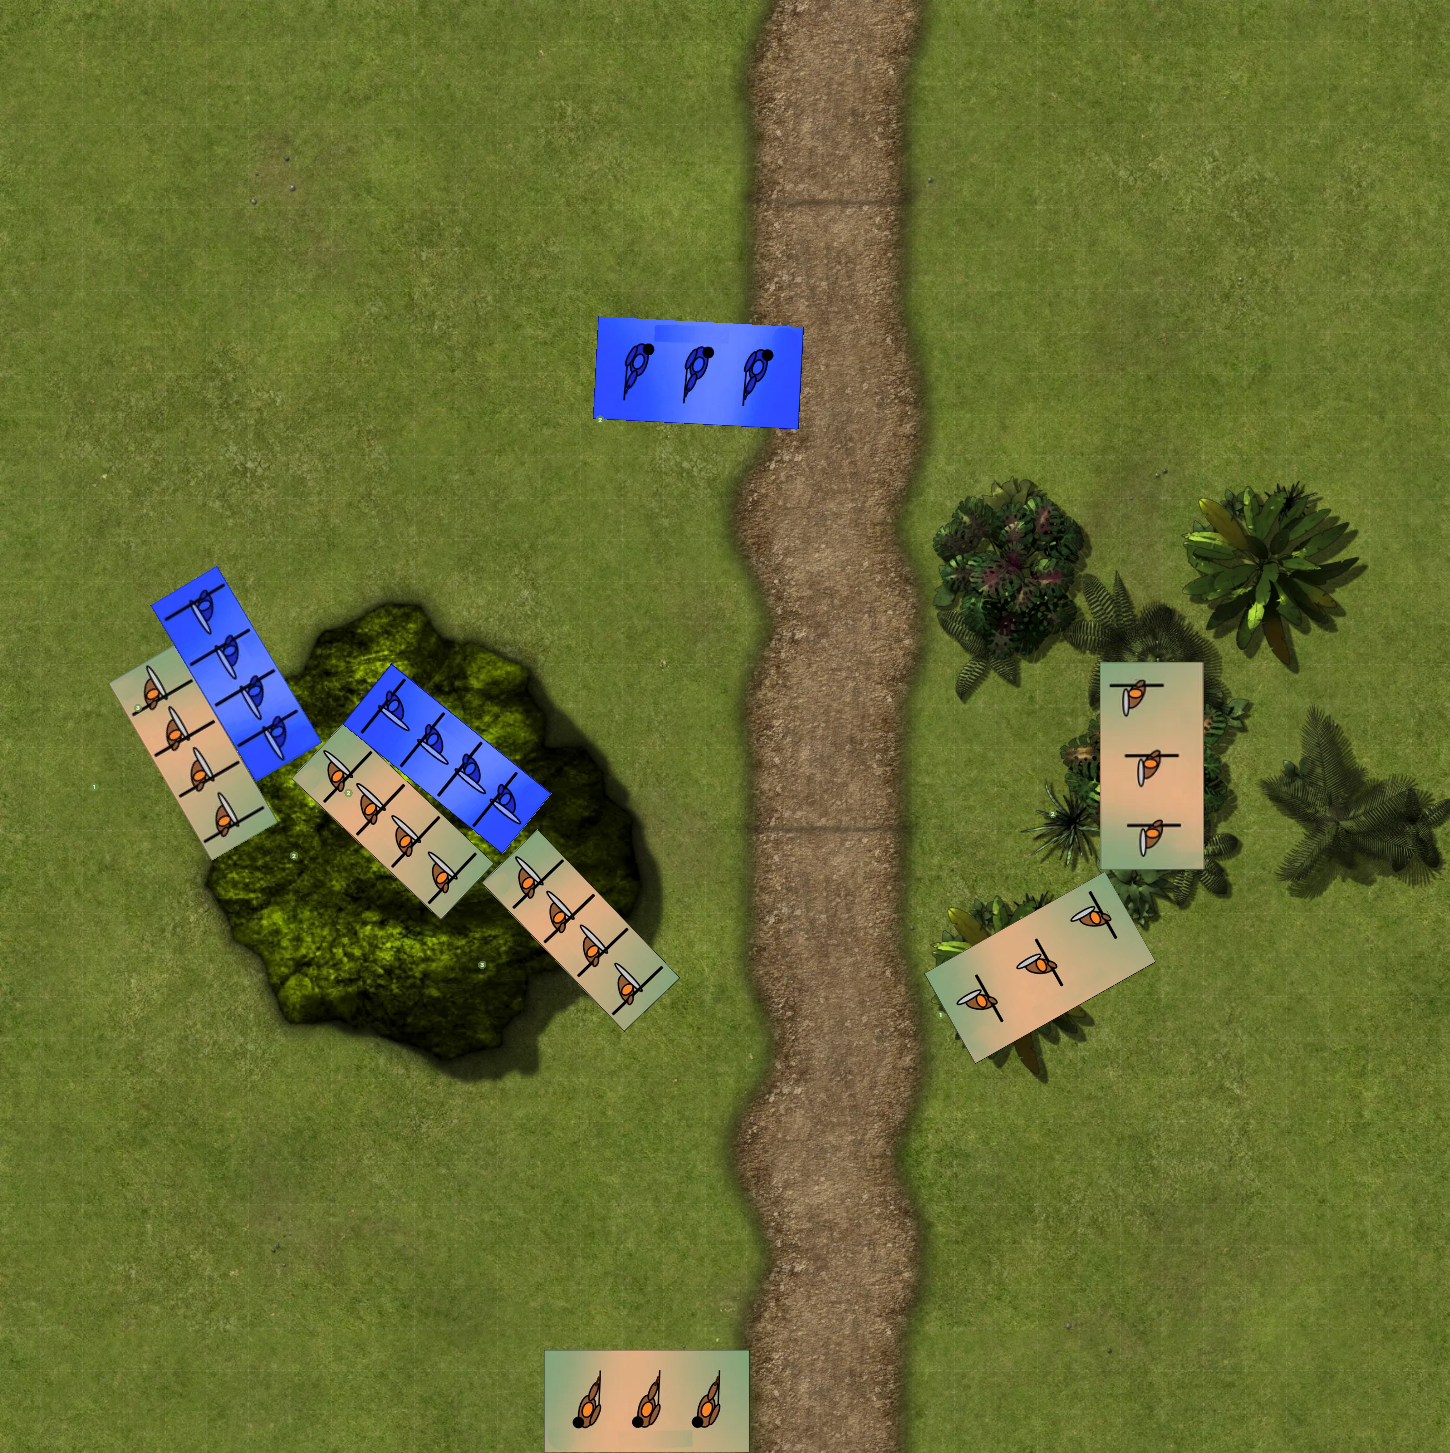
The tide of battle has turned against them, and yet not by as much as it appears, since the Nalgatorio Skirmishers are not yet a major factor in the battle. Instead, the Imperials will take the southern side of the hill with Infantry 2 and 3. Archers 2 pivots so that they will be able to volley in Turn 6.
(I think I made a mistake in the previous turn and inflicted more hits on Nalgatorio Infantry 3 than I should have. Lesson learned: account for all the factors explicitly in the procedure.) Imperial Infantry 1 continues to assault the enemy Infantry, but with the elimination of the archer unit, the defenders can turn to receive the attack and thus remove the flanking bonus. Instead, they have two bonuses from armor and from being on a hill, so the attack does (d6+2)/2/2 = 7/2/2 = 2 hits.
Now a long, protracted melee will likely be the result, with little maneuvering by the various Infantry units.
Turn 5: Nalgatorios
The Rebel Infantry units will charge and try to hold the hill, jockeying for position. Neither Infantry 2 nor 1 will actually enter hand-to-hand combat at this moment, but blood will run on the next turn.
All three missile units fire at Imperial Infantry 1; if they can eliminate it, that could cement a victory. This volley thus inflicts d6/2 + (d6-2)/2 + (d6-2)/2 = 2+0+2 = 4 hits. (Another mistake I made last turn, doing more damage than the rules call for. Something else to bring up in the AAR.)
Turn 6: Empire
Imperial Infantry 1 can’t move. Infantry 2 is blocked due to the Limited Engagement rule from fighting the same enemy on its front, so instead they charge Nalgatorio Infantry 2 (who turns slightly to engage). Finally, Infantry 3 charges and reaches the enemy infantry trying to run up that hill.
The Archers have their range and volley against Nalgatorio Infantry 3 (which has been fighting on the hill for some time). That unit gets both defensive bonuses, so the attack gives them another d6/2/2 = 2/2/2 = 1 hit. They remain in good fighting order.
With the melee, though, we’ll resolve these in order. Infantry 1 attacks, with that enemy continuing to receive bonuses from the hill and armor, so they do (d6+2)/2/2 = 6/2/2 = 2 hits. This is not quite enough to eliminate the enemy. Similarly. Infantry 2 attacks Infantry 2, both on the hill, for (d6+2)/2/2 = 5/2/2 = 2 hits as well. And lastly, Infantry 3 attacks Nalgatorio Infantry 1, but they’re not considered on the hill, meaning their assault deals (d6+2)/2 = 8/2 = 4 hits.
Turn 6: Nalgatorios
No movement here; the fighting just continues.
Therefore the missile troops all continue to pour their fire into Imperial Infantry 1, trying to dislodge it and give their comrades a chance. That’s again d6/2 + (d6-2)/2 + (d6-2)/2 = 3 + 1/2 + 1/2 = 5 hits, taking it to 17.
The Infantry units continue their fighting; note that elimination does not happen until after this phase. Therefore, they each engage their current enemies: 1 to 3, 2 to 2, and 3 to 1. Infantry 1 deals (d6+2)/2 = 7/2 = 4 hits; Infantry 2, (d6+2)/2/2 = 1 hit; and Infantry 3, (d6+2)/2 = 3 hits.
At the end of this turn, Imperial Infantry 1 is finally eliminated. With the Imperials at half-strength and the Nalgatorios still not having lost a unit, I’m calling the battle in favor of the Rebels.

After-Action Report
The Imperial commander (me) made a critical error in positioning his Cavalry so close to the southern edge. This allowed the attacker to get first hit on it and negate the mobility advantage. To be fair, the dice randomly indicating that the hill would be defended by Archers and Cavalry at the beginning did not leave them with a good setup, nor did the force disposition which meant they couldn’t advance on the eastern side of the road.
In terms of the game system, I’m finding a few things:
- I need to account more explicitly for each casualty factor. That doesn’t make for compelling narrative, but it’s crucial here.
- My accounting for hits acquired by each unit (and the way I track the units themselves) improved significantly, although I don’t think I’ll use Numbers (the Apple spreadsheet tool) again.
- Dealing with frontage and facing and measurement hasn’t been that fun for me. Probably these are things that are second-nature to experience wargamers, but I take things so literally and precisely that I’m having trouble figuring out which moves are legal and how much leeway to give. This is the biggest factor, I think: my previous wargaming has been skirmish wargaming, with each model (or token) representing an individual person or monster, and that fits my taste better.
I think that’s the end of this particular experiment. My next solo wargaming will instead be at the skirmish level rather than this rank-and-flank style, hopefully with significantly more narrative elements as well.

