Brisham Wood - Campaign Turn 11
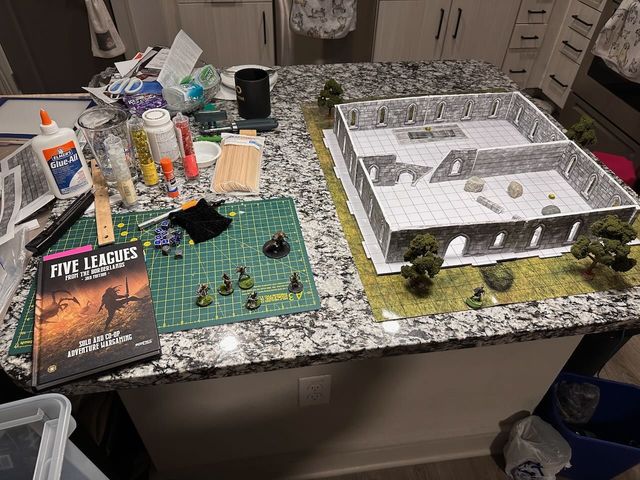
I have taken a drastic step: This time, my game took place on an actual tabletop. More on that below.
Preparation Stage
The Silver Hawks have previously arrived in Outpost Loren and delivered some supplies. This waives their upkeep costs (the garrison commander, Colonel Keymon, ensures they’re supplied). Unfortunately, during a regular equipment check, Tiffany discovers that her self bow has been damaged and will need repairs.
Therefore, she and Carves-The-Dark both visit a local blacksmith and spend a bit of gold, getting their shield and bow back in fighting order. Tiffany also spends some time training with the local garrison, benefiting from their experience in regular combat while giving them some hard-won information on the local forest.
With all the effort the Silver Hawks have put in here and elsewhere in the region, Outpost Loren has increased in size and logistical support from a tiny hamlet to a thriving village! (This is an expenditure of those Adventure Points, which will also help them survive in case of certain enemy plans.)
A local priestess, Sister Talisana, approaches them with a contract offer. She would like them to locate the Amulet of St. Barker; unfortunately, she can provide them with precious little information on its location. But if they locate it and return it to her, she can provide them with a bag of gold (and an Adventure Point). There’s no time limit to this task.
With all this in mind, and recalling that Drog is still not in combat shape, Maurice tells them that they’re going to head to Irongate, the largest settlement in Brisham Wood.
Adventuring Stage
The travel to Irongate passes uneventfully. On arrival, while Drog continues his recovery, the rest of them ride patrol in the area, hoping to suppress some of the caravan raids.
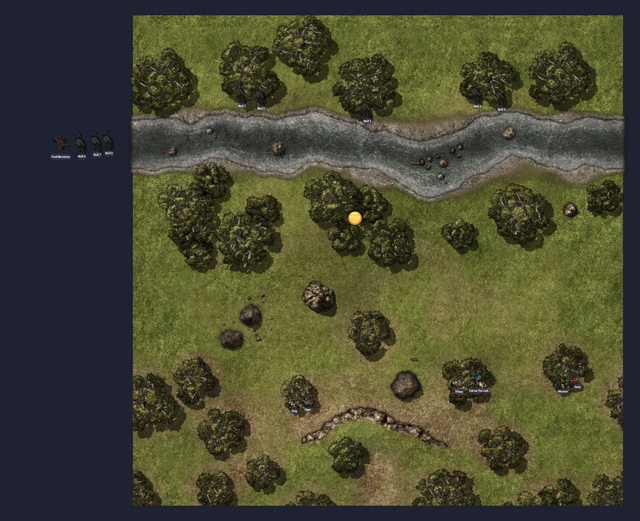
While out, however, they come upon a ruined tower housing the infamous Brush Marauders! They tie up their horses and approach the enemy camp carefully.
As I noted in the introduction, I did not play this turn via Owlbear Rodeo. Instead, I acquired and painted several WizKids pre-primed miniatures (some of which I already owned).
 Maurice, Daisy, and Chert
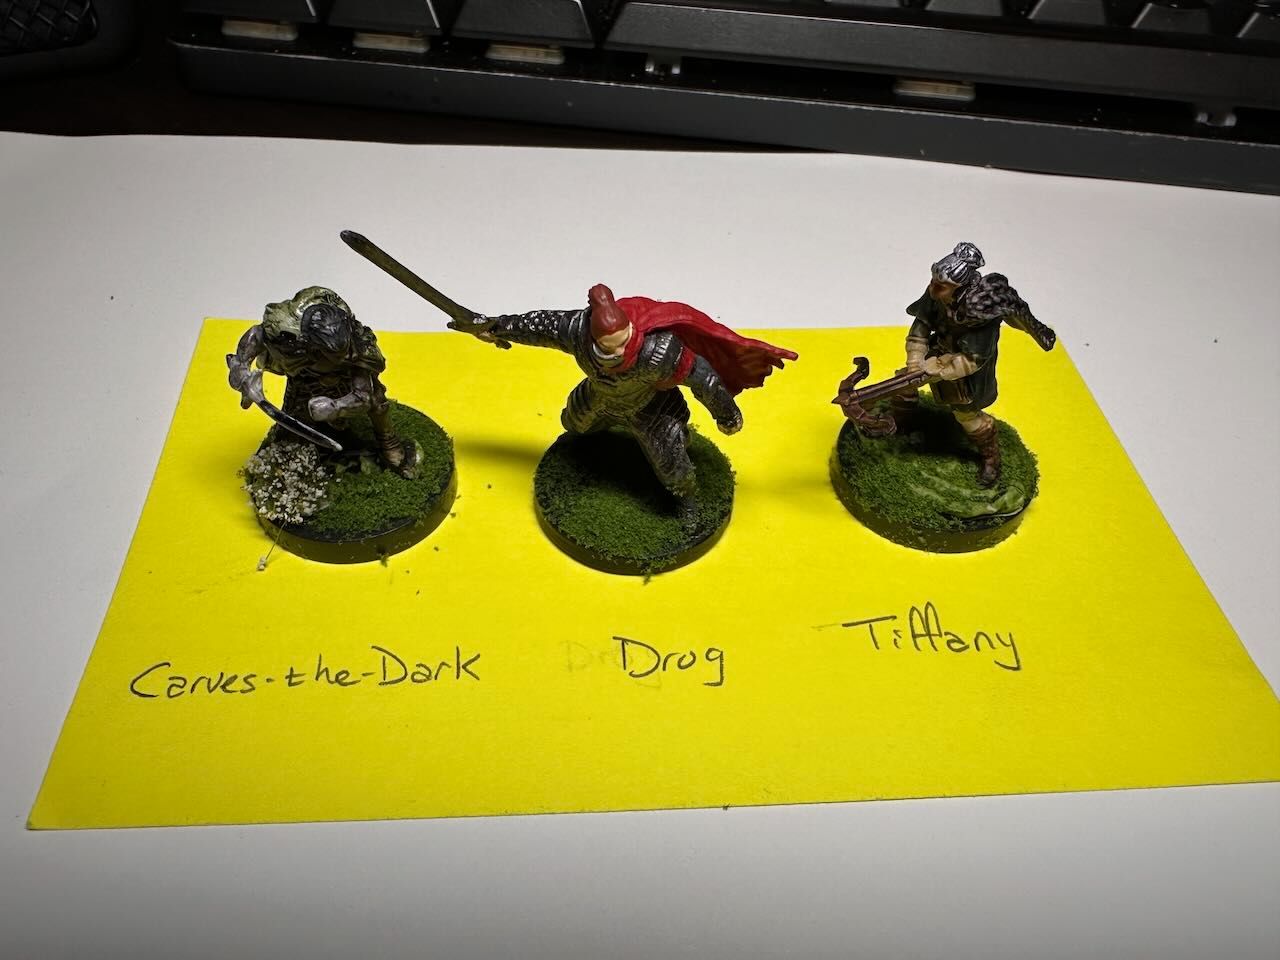 Carves-The-Dark, Drog (a pre-painted mini), and Tiffany
Not pictured above: Danticus (because I forgot, but also he’s another pre-painted mini)
I’d heard good things about using papercraft terrain, so for the ruined tower, I purchased a Tower Ruin Paper Model (affiliate link) from Dave Graffam Models. I only have an old black-and-white printer, but I do have a lot of cardstock paper. So I painstakingly printed, cut, and glued eleven pages worth of surfaces. The rest of the terrain varied between actual models (whether purchased at my local Michael’s or taken from my garden) and construction paper to represent larger areas. I also used paper standees from a variety of sources for the enemies.
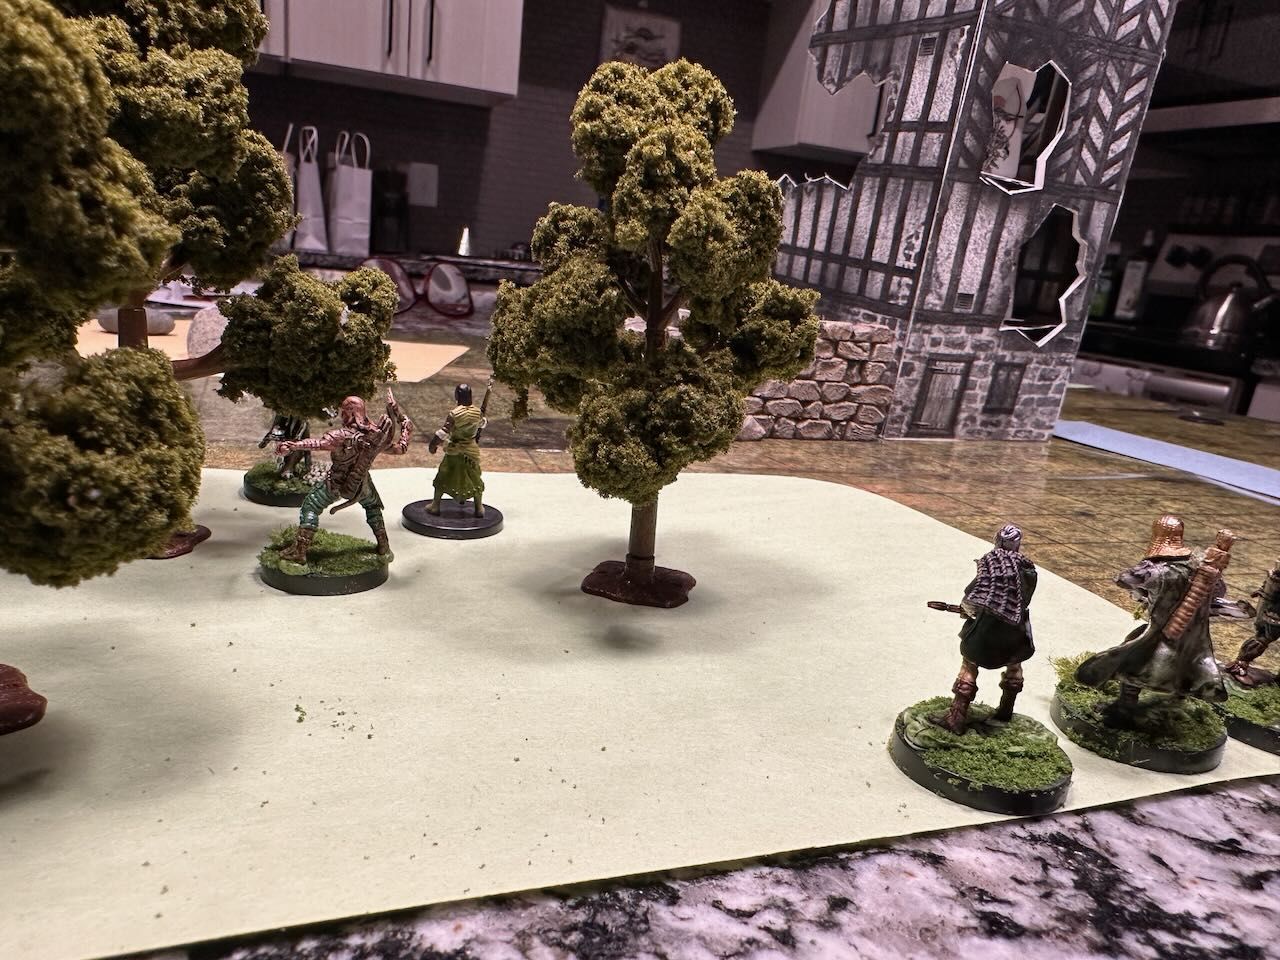
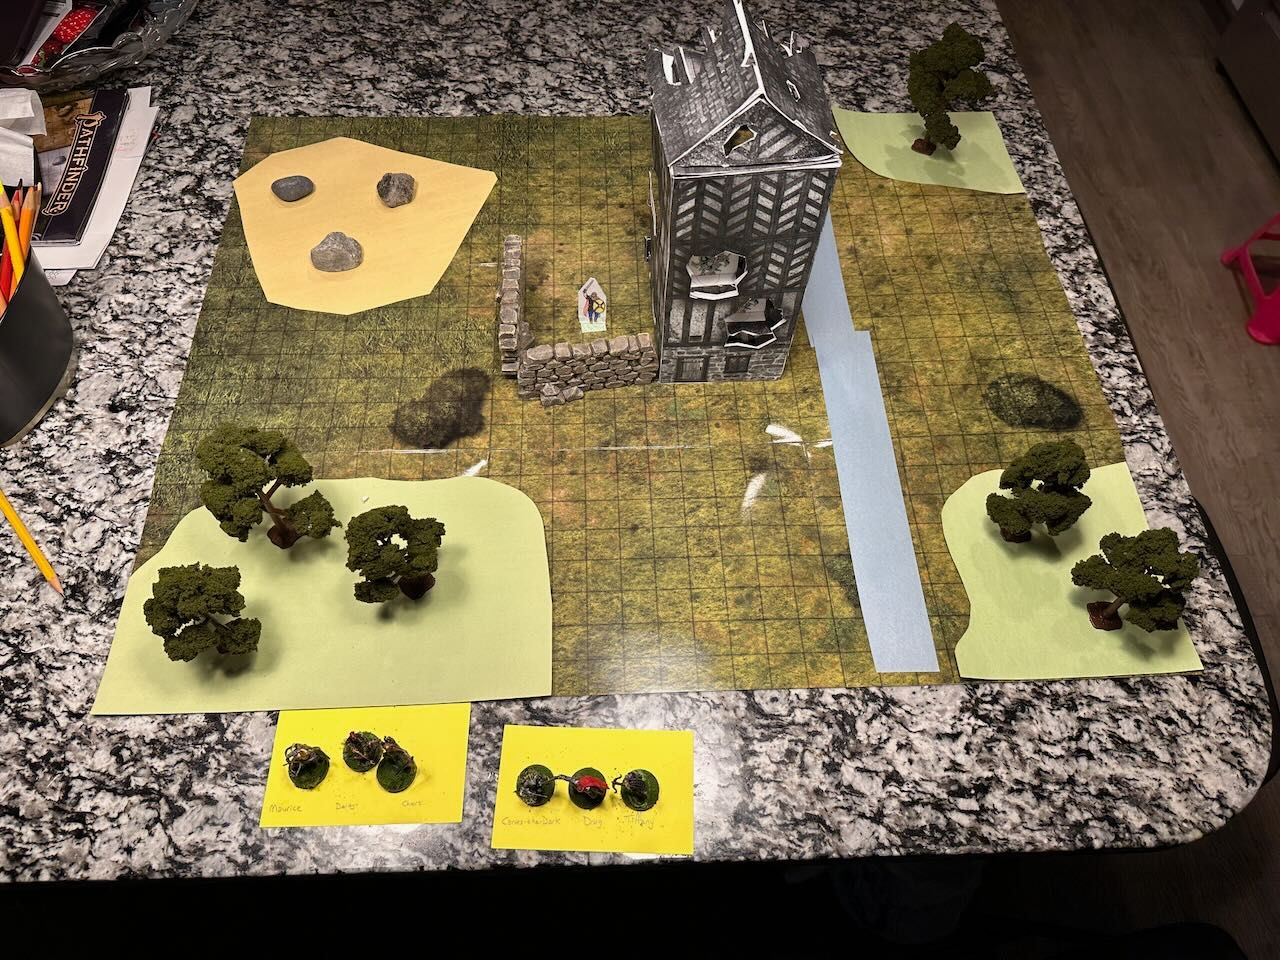 The full battlefield before the fight
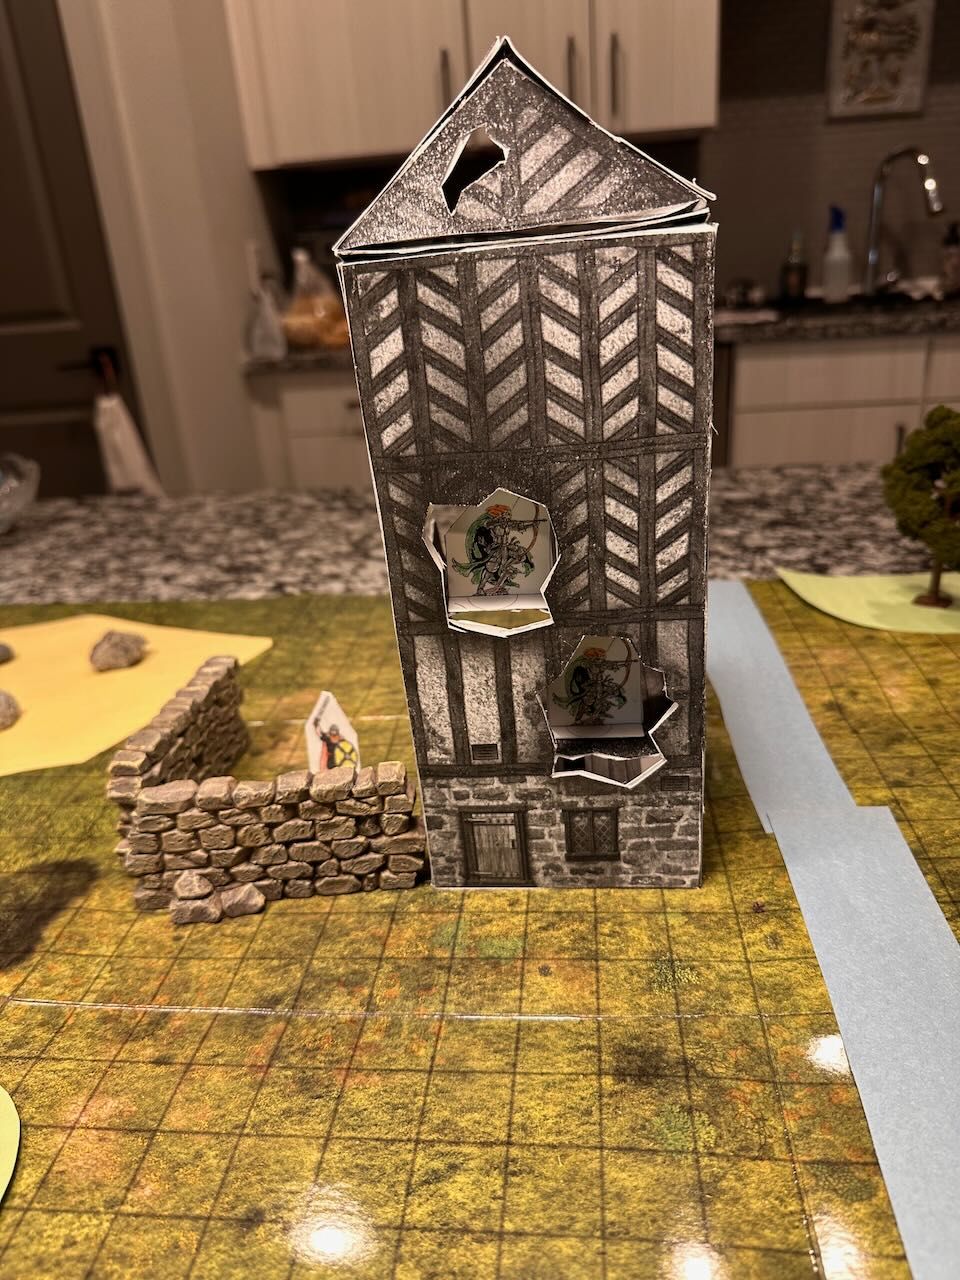 Tower ruin closeup
The enemies consisted of two bowmen and a stout captain, plus a returning patrol that the warband knew would approach but was uncertain of their location and timing.
To start the fight, Maurice applied his tactical skill (Battlewise) and seized the initiative. They launched volleys of crossbow bolts and arrows at the marauder bowmen holed up in the tower, to no avail. Another squad, led by Carves-The-Dark, moved quietly through a stand of trees in preparation to take out the leader.
 The fight begins
Turn 1
Daisy and Maurice both miss their shots. CTD moved out ahead of the squad. When the enemy reacted, they returned fire against Daisy to no effect, while their captain left the area of the secure yard, hoping to meet his assailant alone. The returning patrol entered the battlefield but appeared unaware of what was happening. Danticus and Chert followed CTD, while Tiffany moved to just inside the treeline for a better shot.
Turn 2
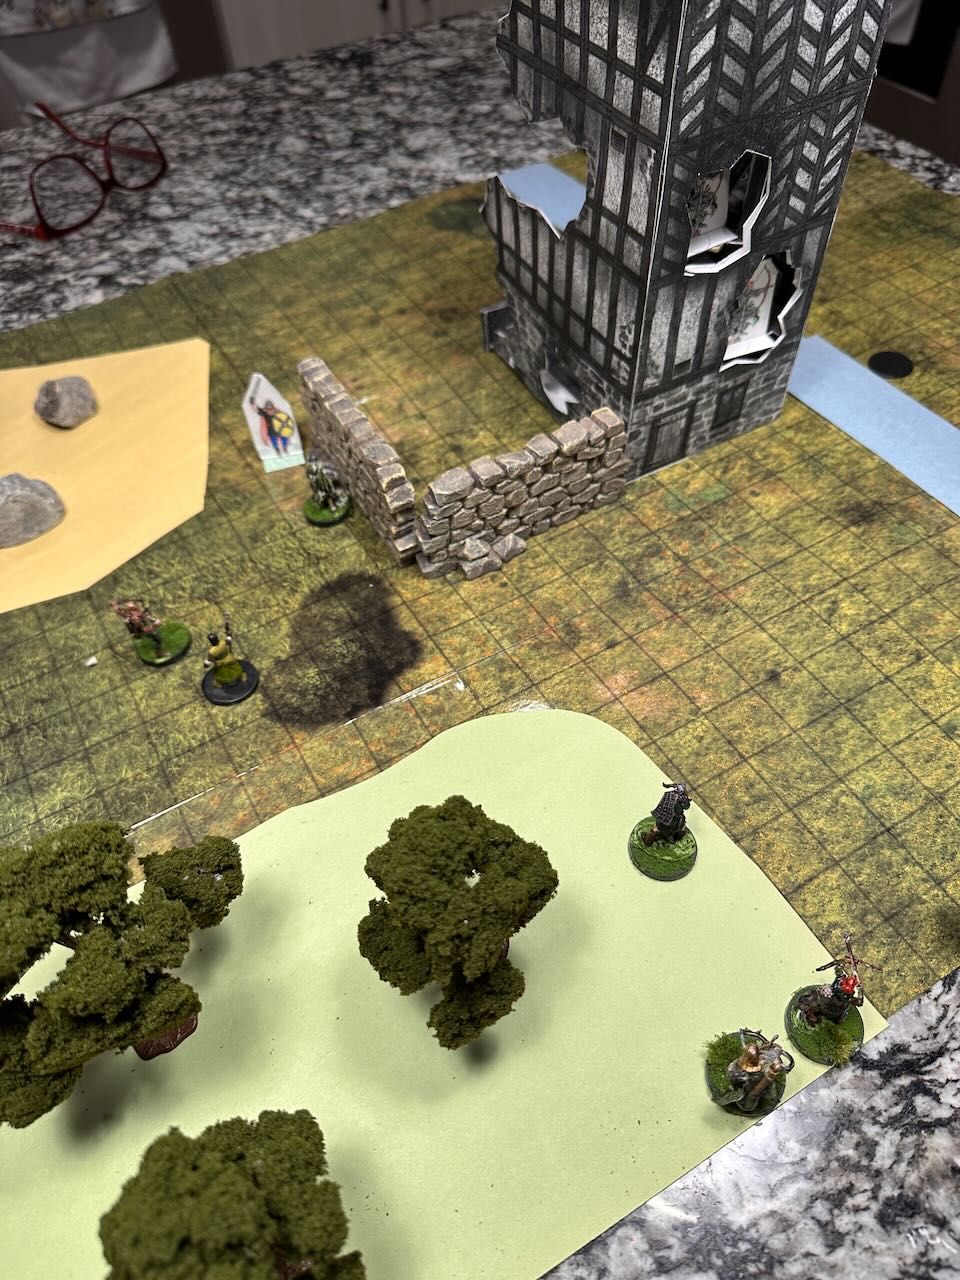 Just before it all goes bad
Chert, in concert with his fey-blooded ally, assaulted the enemy captain. But that captain proved too much for him, and the zealot ended up as a casualty very quickly. One bowman missed, while the other only landed a glancing shot on Daisy that did nothing more than set her back on her heels for a moment. The enemy captain turned his attention to Carves-The-Dark and took them down as well. Seeing the more skilled and heavily-equipped members of his group taken down so quickly, Danticus pulled back into the trees. Daisy finally took out the bowman firing on them from an upper story, while Tiffany emptied her quiver without hitting anyone. Maurice similarly could not hit a target. Despite losing a member of their band, none of the enemy fled.
Turn 3
Emboldened by her previous success, Daisy tried to take out the remaining bowman. He made good use of his cover, though his return volley left him without any ammunition as well. The enemy captain continued to advance implacably through the difficult undergrowth.
At this, the rest of the Silver Hawks withdrew from the battlefield.
Resolution Stage
Of course, not having achieved any objectives or held the field, we are awarded no Adventure Points, gold, nor loot. However, all the heroes gain 1 Experience Point, allowing Maurice to advance and gain a second Luck point.
As they settle into Irongate, word reaches them that outriders from Outpost Loren have been patrolling the region. In the next campaign turn, they will not need to roll on the Travel Table during their journeys.
Wrap-Up
I had tremendous fun painting the miniatures! I have not done that in years, and even back then I lacked all skill (as I still do). But I learned a good bit, and the fact that they don’t look particularly good doesn’t really faze me. This is how we learn to do things! I have also learned that the “grass” stand-in I used didn’t stick particularly well. Bird sand will likely stand in next time.
The terrain was less enjoyable. Specifically, I chose one of the largest models offered by Dave Graffam for my first try, and that made it highly complex. Cardstock might work well for standees or smaller papercraft models, but this was more than I’d like. Next time, I’ll do something smaller or perhaps glue cut-out textures to foamcore for something slightly more substantial.