Starforged Experiment
I have noticed that Scum & Villainy doesn’t have as many random tables as Blades in the Dark (which makes solo play a little more difficult). Because of that, I’ve been using oracles from Starforged to supplement.
So what if we just play Starforged? I’ve had this idea for a game in which a bounty hunter is tracking and apprehending war criminals.
Truths
No magic! Apparently anti-gravity and faster-than-light technologies exist, though, and that’s basically the same thing already, right?

Intelligent alien life doesn’t seem to exist (anymore), though inscrutable ruins remain. Artificial intelligence exists but is understood to be rare, and those who “control” them go to great lengths to prevent them from escaping.
Five major Founder clans exist (names and details to be determined in play), with most skirmishing taking place between professional military contractors. Sustained large-scale warfare on an interplanetary (to say nothing of interstellar) scale is effectively impossible.
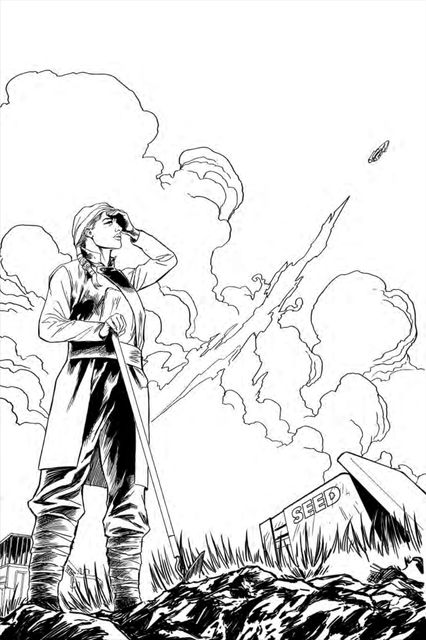
Character: Merrick Salvi
- Paths: Bounty Hunter, Sleuth
- Backstory: Sole survivor of a horrific slaughter
- Background Goal: Avenge those killed when I survived
- Starship: “Silver Hammer”. Taken while fleeing from that attack. Interior spaces crowded with exposed cables and conduits. Hull rattles and groans in atmospheric flight.
- Companion: Combat bot, “Corion”
- Stats: Edge 2, Heart 1, Iron 1, Shadow 2, Wits 3
- Look: Workers clothes, haunted eyes, short & wiry
- Act: Observant, terse
Sector
In the Terminus region (relatively populated), so we specify four settlements.
Argosy (Deep Space)
- Star: Hyper giant generating turbulent solar winds
- Population: Few
- Authority: None / Lawless
- Projects: Subsistence / Secrecy
Polaris Station (Deep Space)
- Star: Unstable, showing signs of impending supernova
- Population: Hundreds
- Authority: Ineffectual
- Project: Raiding
Port Providence (Deep Space)
- Star: White dwarf shining with spectral light
- Population: Hundreds
- Authority: Corrupt
- Projects: History / Research
Freya’s Hold (Planetside)
- Star: Burning yellow
- Population: Thousands
- Authority: Unyielding
- Projects: Expansion / Mining
- Planet: Vital (“Sif”)
Starting Location
For what I’m thinking to do, Freya’s Hold makes the most sense. So let’s dig into it a bit more.
- First Look: Built from random scrap
- Trouble: Preyed upon by raiders (ties to Polaris Station)
- Atmosphere: Ideal
- Observed From Space: Descriptor / Focus => Hidden Art
- Something is in symbolic shapes that aren’t noticeable at ground level
- Planetside Features:
- Floating Terrain (this is the Hidden Art)
- Sudden Weather Fluctuations
- Diversity: Two Biomes
- Ocean
- Tundra
Connection: Roland Petrov
- Role: Leader => Reconstruction Administrator
- Rank: Dangerous
- First Look: Imposing, Haggard
- Goal: Seize Power
- Revealed Aspect: Quirky, Clever
I’m imagining Werner Herzog in “The Mandalorian”.
Sector Trouble
Ships regularly go missing. (This also fits with the settlement trouble!)
Action
Finally! We’ve been asked to apprehend the leader of a pack of raiders troubling Freya’s Hold.
Roland Petrov is trying to rebuild the settlement after a war. Most activity here centers around mining the mineral aerolite from the floating motes, which is then used in antigravity technology. The settlement itself is build from old decommissioned ships and abandoned industrial equipment.
Merrick hauls in a couple of raider thugs who were left behind after a recent skirmish. But Roland wants the leader, not these small fry. We swear our iron vow on Roland’s desk, built from the material from a Founder ship.
Swear an Iron Vow: Strong hit. Based on our Bounty Hunter path, we have a solid lead and mark progress immediately. The two prisoners gave us enough information that we can head straight to Polaris Station.
Set a Course: Strong hit. We reach our destination and the situation favors us.
Polaris Station Details
- First Look: Natural Path (the FtL passage puts us right on approach into the anchorage)
- Initial Contact: Wary (they’re not expecting us but we have passcodes from the prisoners)
- Trouble: Failing Technology (life support on the fritz from stellar interference)
Infiltration
Merrick and Corion disembark and blend in. We make our way to the ubiquitous cantina and order a drink. Time to gather information by ordering a drink and asking who’s in charge around here. We drop the names of the prisoners (without noting where they are): “they sent me, I’m looking for work”.
Gather Information: Weak hit. We get a name for the head raider, “Basilisk”, but they’re not around right now. Their right-hand man, Buzzard, can handle it though. We’ll go talk to him.
- First Look: Grim
- Initial Disposition: Unfriendly
We ask what it takes to join up and maybe get in some action.
Gather Information: Strong hit. We’ll check in on the Action / Theme oracles. “Construct Pride”
Buzzard wants us to show some intimidation. You know, “show me your war cry!” and all that.
Compel: (+Iron) Strong hit. Mark progress, we’re “in”.
Time for the briefing! That means checking in with oracles.
- Is this a raid (almost certain)? Yes
- Will Basilisk be involved (50/50)? Yes
- What’s the raid targeting (Descriptor / Focus)? Colossal Structure
We want to meet with Basilisk, though. He’s here, let’s see if we can talk our way in by lying that we have a gift for them.
Compel: (+Shadow) Strong hit. We’ll meet with them - is somebody else with us (likely)? Yes.
Who is this dude?
- First Look: Plain, Accented (they speak with an accent from another region)
- Initial Disposition: Indifferent (why should he care about us at all?)
We present Corion, our combat bot, as a present, though of course this is a ruse.
Enter the Fray (Formidable): (+Iron) Our objective is to force Basilisk to surrender to us. Weak hit: we’re in control.
Strike: (+Iron) Strong hit. We shoot the guard immediately! The guard is almost down.
Strike: (+Iron) Strong hit. The guard is incapacitated by our electromesh.
“Throw down your weapon and surrender! I’m taking you in.”
Gain Ground: (+Heart) Weak hit. Basilisk is a bit shocked at the brazenness. Revealed Aspect: Greedy, “the bounty on me is about to get higher”. We take +1 on the next move.
Strike: (+Iron) Weak hit. We attempt to disarm Basilisk using a stun baton and end up in a bad spot with our back to the door.
Clash: (+Iron) Miss, burn momentum for a strong hit. Basilisk comes at us and pushes back. We surprise him with our ability to take a punch and send him flying backwards into a wall.
Time to force his surrender.
Take Decisive Action: Miss, with a match. We’re defeated - guards rush in, disarm us, and throw Merrick into the brig.
I don’t see how this ends up being particularly survivable for him and this will end this specific experiment.
Lessons Learned
Prep is play, for sure, and I enjoyed most of the setup here. I’ll probably re-use these truths, although I didn’t like the sector generation that much. That’s probably because I rolled several Deep Space settlements, so next time I might choose to fiddle with that a little bit.
Oh yeah, there will be a next time, but not with Merrick. Instead, I’ll try some of the exploratory content so that we’re digging more into the world around us more so than fighting and interaction.
The Delve book for Ironsworn is on its way, so the next time I dig into this system will be using that. But Starforged itself will also come up in the future, possibly mixing in Stars Without Number.