Scarlet Hero in the Undercity - Part 2
Last time, Garrison the Fang ventured down into the Ruins of the Undercity (RotU) but found nothing useful. In the end, he decided to return to the surface and look for another entrance. Today, our Scarlet Hero (SH) will try again.
In the City
He doesn’t have anything to buy; the closest thing he got to “treasure” was a set of fire beetle glands. At least he doesn’t plan to buy any torches for a bit; the glands will last him a few days.
The only thing he needs to do is to find a new entrance to the Undercity. He hears about a small cave in somebody’s cellar and decides to check it out.
Into the Ruins
This entrance has a few small corridors and a medium-sized room. Rather than go through either of the doors he sees, Garrison will continue straight ahead from the initial corridor, at least at first.
Turn 1
The corridor is as unremarkable as it gets: damp air that smells of mold, dark flagstones with no light beyond the feeble glow of the gland he holds before him. He pauses every bit to tap the floor with the butt of his spear and listen for echoes, or other sounds that could indicate danger. Occasionally he presses his ear to a dirty wall or looks to see if he’s somehow missed the outline of a door in the rough masonry.
Turn 2
The cautious exploration continues, although the next segment of corridor has nothing of note beyond a side passage on the right. He marks its location on his crude map and continues forward.
Turn 3
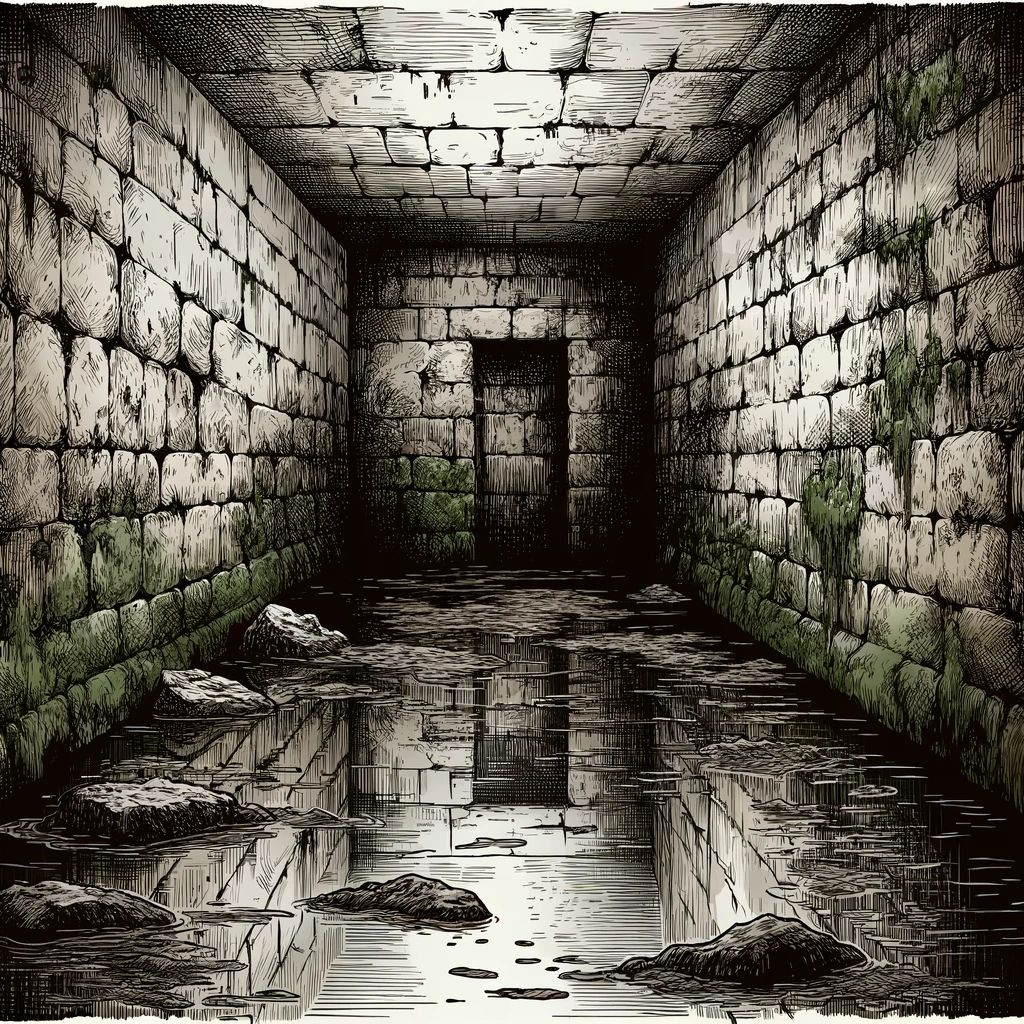
There’s a door to the right and he first checks the rotten wood for signs of spores, but this one seems to be safe. He opens cautiously after listening and finds a small, half-flooded room, 10’ x 20’, with no obvious exit. It seems empty other than the water dripping in from some unseen leak.
Instead, Garrison keeps going down the corridor.
Turn 4
The condition of the floor improves slightly to flagstones, and he finds more of those crude paintings. He pauses a moment and regards them critically; they seem to indicate prisoners or people being taken into servitude in some way. This isn’t really the sort of thing that will bring him coin or power, though, so he presses forward.
Turn 5
Will this dank corridor never end? He finds a few clay lamps that cast light; somebody is maintaining them or at least keeping them lit.
Turn 6
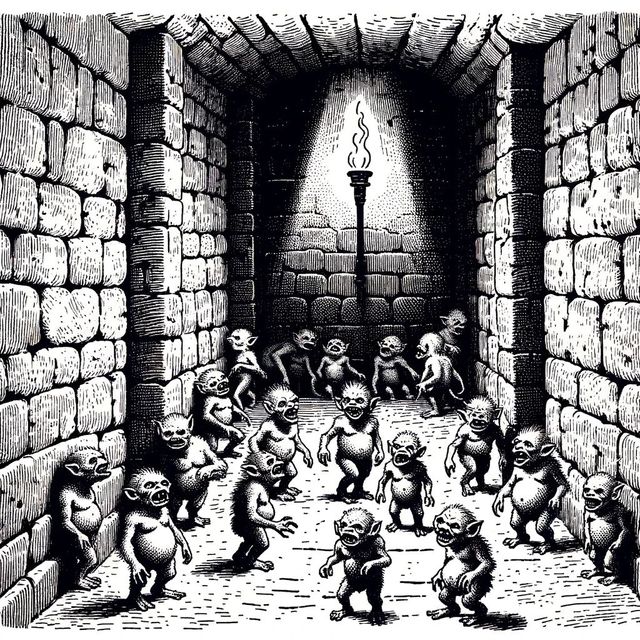
Garrison finds a wandering monster, or more accurately another group of mites, nearly a dozen. But they’re trap setters, so first he has to deal with that: glyph of negative energy, save or “lose 1 energy level”. Is that like an experience level? I’m not sure, and this doesn’t seem to be in Labyrinth Lord (the base system for RotU) that I can find. If he fails, then I’ll have him Defy Death — but he makes the save and it’s moot. Also, this explains who is maintaining the lamps.
Now he’ll turn his attention to these creatures. One other thing RotU notes about them is that “helpless victims are bludgeoned into unconsciousness (2% cumulative per hit) and killed”, so they’re quite vicious.
This reminds me of another small thing I dislike about Scarlet Heroes: there are three different reaction roll mechanics! There’s the morale check “when the monster has cause to think it’s losing a fight” (with some guidance about what that might mean), then there’s the reaction roll “when PCs meet another creature or group in some lonesome place” (with guidance about extremes on the results and very little about what’s in the middle), and then a reaction table “to determine whether or not the NPC is feeling cooperative about whatever prospect your hero just proposed.” All of them work quite differently mechanically, and the one I use most often is the one with the least guidance. The first two are fairly standard, to be honest, but the reaction roll could use a bit more besides telling me that 16+ is the best possible while 2+ is the worst possible.
Looking at Worlds Without Number, also by Kevin Crawford and having lots of development of many of the core systems in Scarlet Heroes, I see that the reaction rolls there have a bit more guidance in terms of ranges, and I’ll let that guide me to an extent (albeit adjusted for the 2D8 roll that SH uses). So these mites will be “more friendly and benign than you’d expect them to be, given the circumstances”. They’re not helpful, but they won’t attack either; just different parties passing each other in the dark.
Turn 7
The corridor here has more of those clay lamps in alcoves among the masonry, with nothing else happening here.
Turn 8
After this, the corridor gets a bit rougher, perhaps with less maintenance and repair by the denizens. It’s dark, although the air is slightly warmer, and he gets suspicious. These suspicions are proved out by the presence of a 20’ deep pit trap which he barely avoids, thanks only to this continuous spear tapping.
Shortly past that, however, the corridor turns left.
Turn 9
The corridor reaches a 20’ x 20’ chamber with an exit to the right. There are a noticeable amount of pottery shards on the floor, which distract him from noticing the 10’ pit trap with spikes! He falls in but makes his saving throw, taking only 1 damage. He climbs out and dusts himself off, peering around in the darkness to see if anything else is here.
Turn 10
The cuts and bruises aren’t too bad and so he’ll spend a few minutes to bandage himself up, drink some water, and generally take a breath. He’s still listening for any approaching creatures, however.
Turn 11
The exit here is actually a grate leading to a corridor beyond. Garrison’s pretty stout, so between his natural strength and the use of a crowbar, he’s able to pry it open and continue on his way.
Turn 12
This is an unlit corridor but the walls and floor are that marble and alabaster; perhaps this was more than just a sewer at some point. In fact, there’s a magical trap here as well, a cold glyph marked into the top of a T intersection that no amount of acute hearing or prodding with a spear haft would find. He makes his save, however, as a blast of magical energy blows past him. The air is chilled but he doesn’t seem to have been affected other than realizing that was a close call (and that there are things here beyond his understanding).
Turn 13
To the left and right he sees corridors leading deeper, so he decides to go right. It’s dark as ever, with rubble on a cracked floor. He’ll keep going.
Turn 14
Garrison cautiously moves down the dark passageway, noting that it curves right at 45° and keeps going. The glow from the fire beetle gland hasn’t dimmed significantly, but he pauses to listen ahead. The floor here is rough as ever, but also seems solid. He’s not moving quickly, since he’s learned how dangerous that can be.
Turn 15
At some point these corridors should lead to something, he thinks. But not yet… The walls are cracked as the hallway takes a sharp turn to the left.
Turn 16
Now this is unusual: a 60’ diameter cave with 3 exits back on the same wall! It has rough stone walls and flooring, and the air is as damp and moldy as almost everywhere else. Somehow, this place is empty, too. What happened to all the untold treasures to be found in the Undercity? Have they been picked clean over the years?
Turn 17
He takes the nearest corridor, leading to his right, dark with the sounds of dripping echoing down. As he does, a set of stones fall upon him, but he dodges most of them and only takes 1 damage. There’s a side passage to the left, but he’s not heading down that just yet.
Turn 18
Just past that side passage, a dozen giant rats await! They’re not particularly strong, but there are enough to give him pause. They’re hissing and baring their teeth, so instead he’ll dart down that side passage after all.
Turn 19
This is a small 10’ square room with one obvious exit on the opposite wall. As he’s seen before, the water here rises up to waist level, and there are over a dozen jinxkin here. That tells me there’s a trap as well, because that’s how they operate, and indeed a fusillade of darts come flying at Garrison! None of them hit as he dives out of the way. Still, that was mostly a distraction from the dimunitive tunnel-dwellers, so he’s surprised by their attacks.
Round 1: Before he can do anything, he’ll have to deal with their own darts. With his AC of 5 and their to-hit of +1, they need a 14 to hit him, so I’m just going with sheer numbers and saying that 35% of the 17 of them, or 6, hit him, for d2 damage, each. Of those, only 4 actually deal damage, so he’s down to 5 HP. Brandishing his spear, he kills one and in the ensuing fray brings down another.
They need to make a morale check here (and, in a non-mechanical sense, so will he!) Losing two of their number is apparently not enough to scare them off, so he’ll decide to pull back and hope they don’t follow.
(The numbers encountered in RotU seem quite high, even for a group: 17 enemies is quite a lot until you have significant AoE abilities, and even then that’s a lot of attacks even if none of them are very likely to hit.)
Turn 20
He’s back in the large cave, taking a different exit back to the west. This turns out to lead to a dead end full of rubble, and he would rather not spend the next several hours digging it out (particularly if those jinxkin come nosing around.) This is a good place to rest and recover, however, so he’ll do that and gain back 2 HP (up to 7).
Turn 21
There’s another passageway that should (hopefully) lead to something, and it’s a dirt floor that feels somewhat warm, putting him even more on edge. After a bit, he comes to a 4-way intersection, but keeps going straight.
Turn 22
Garrison sees a door to his right, but ahead is a chamber, so he’ll leave the moldy and rotten wood alone for now. This is another of those octagonal chambers, 10’ on a side, but with no obvious doors. It’s full of refuse and has a putrid smell; perhaps this is a nest of some tunnel-dwellers, or at least their privy. He checks anyway to find anything valuable, but nothing turns up.
Turn 23
So he’ll go back to the door and listen for noises on the other side as well as check for spores, but it seems safe. He opens it and finds another octagonal room! This one has three doors, though, and a cesspit in the middle. After considering a moment, he decides to check out the door on the opposite wall.
Turn 24
This is a strong brass door, locked securely. He’ll try to force it open, although it’s somewhat resistant unlike those weak wooden doors. He gets it open, but it takes enough time and effort that I’ll roll a wandering monster check. Fortunately, nothing comes along. Beyond the door is another chamber.
Turn 25
The chamber is 30’ square with no obvious exits. It’s not empty, though; here in this damp moldy place is a pair of giant fire beetles guarding hidden stone containers containing treasure.
This is almost not a challenge for him; he kills one beetle and the other goes squealing off into the dungeon. That’s another 3 days of illumination; fortunately, he does in fact find the treasure! The stone containers hold glass and clay shards equivalent to 1000 cp, or 10 gp.
He sighs to himself at the paltry findings, but at least he doesn’t have any new injuries to show for it.
Turn 26
Back in the octagonal chamber preceding this one, he checks the door to the south (to the left as he originally entered). It’s unlocked and opens to a corridor with a stone statue in it. Something about it tears at his mind, as if it represents some creature or phenomenon beyond human comprehension; he needs to make a saving throw or face insanity! He fails, and his mind starts to tear itself apart.
This means a Defy Death roll, I judge, and he pulls himself out of this without any additional harm. The next Defy Death will be a D6 roll, however, making such a positive outcome somewhat less likely.
After this, the corridor turns left 90°.
Turn 27
What a surprise, another of these interminable corridors. The warmth is present again, and he remains unsure of what that could mean. After a bit, it curves back to the right and continues on; he’s moving cautiously as ever.
Turn 28
He stops again upon seeing 15 (!) giant rats ahead of him. As you might expect, they don’t seem happy to see him either. He’ll back up and try to find another way to go.
Turn 29
Back in that most recent octagonal chamber, he’ll try the last door. Despite its rotten condition, someone has locked it. He checks carefully for traps and then forces it open. On the other side is a corridor that leads back to a swarm of rats he found earlier. This is no good; he heads back to a passageway he passed earlier (that 4-way intersection from Turn 21) and takes a different path.
Turn 30
This passage leads only a short distance to more rubble blocking his path. Checking his map, it’s clear that he’s been through most of the passages in this area, so he’ll go back to that T-intersection where he encountered the cold glyph on Turn 13 instead and see what he can find on the other side.
Turn 31
A dirt floor leads through darkness, but fortunately he doesn’t encounter anything dangerous yet.
Turn 32
The hallway turns left and descends just slightly enough to the point where it’s entirely flooded! Rather than swim through a dungeon and encounter whatever horribleness it contains in an environment where he won’t be able to see or fight effectively, he’ll backtrack even further to the side passage he found on Turn 2 and see what’s there.
Turn 33
Back not too far from the small complex where he entered, he finds a rectangular 30’ x 40’ chamber with three exits, two on the left and one directly opposite from where he entered. The room is damp and moldy, as with most of the rest of the dungeon, containing a monster and treasure! He can see stone containers sitting out in the open, with 9 gibberlings guarding them. This is (hopefully) what he came for. Unfortunately, his fire beetle gland isn’t bright enough to keep them at bay; a torch might intimidate them a bit, but his isn’t lit.
Round 1: Before they can react, he leaps into the fray with spear and shield, laying about him. He kills a pair of them immediately, then turns and slays another. The rest of them don’t even blink and continue to attack him; there are 6 remaining, and three of them get hits in, dealing 4 damage total. He’s down to 3 HP.
Round 2: He takes down 2 more, leaving only 4. One of them hits him for 1 damage, bringing him down to 2 HP. This fight isn’t over!
Round 3: He kills another with his primary attack, then his Fray die kills one more. The last two have no success in reaching him at all.
Round 4: With so few remaining, it’s a bit harder to get them rather than just jab into a crowd, but he’s able to finish them both off.
Time to see what the treasure is… precious conch shells worth a total of 2000 sp, or 200 gp. This is indeed a good find, and he’s able to rest and recover here for a bit. He’s back up to 4 HP, but decides that this is enough for now. He’ll head back to the city through that cellar.
Back in Town
Per RotU:
Traders and shopkeepers will evaluate the goods you are trying to sell and take their share before converting them into gold pieces. When you sell wares you’ve found in the Undercity in town, check the following table.
I’m going to simplify these and use the Reaction Table from SH, which is 2D6+1 (Charisma) as NPC Strangers. On a 6-, they will require their share; on a 7, they’ll halve it; and on 8+, they’ll give him the full value. No such luck for the shards, but the shells (where the real value is) bring full price. So that’s 80% of the 1000 cp, or 800 cp, which is 8 gp, and 100% of the 2000 sp, or 200 gp. That’s a total of 208 gp, which is a good haul for a day’s work. And at least this time he didn’t die, although he nearly lost his mind…
Rather than use the rules from LL or RotU to level up, SH just has characters advance after a certain number of adventures (in this case, expeditions to the Undercity). So Garrison reaches level 2, granting him an additional point to his attack bonus and 4 HP. He also gets an additional trait point, “selecting it to memorialize some great deed or narrow escape the hero accomplished”. I think that narrowly avoiding insanity from that statue is a good choice for that, so I’ll give him a point in “Master of His Mind”.
There’s an outbreak of plague in the city, though! Garrison has to make a Constitution saving throw or contract a terminal skin disease. He makes the save, but this feels a bit chickenshit: save or die in a random campaign event outside the dungeon, where no player skill or planning can help? I really dislike this, and I don’t really love how infrequent treasure comes up in the game either.
Next time, I may do something different for the content generation. SH is fun, and the combat system is working well for me, but the distribution of danger versus treasure in RotU is not working for me at the moment. Maybe I should continue with Scarlet Heroes by itself, just themed around the Undercity setting?