Ironsworn Delve - Part 6
Reviewing our main quest real quick, we’ve changed it just slightly (expanding it, really) to cover finding the treatment for the plague overall. It sits at Formidable (5/10), and the remaining outline looks like:
- Return to Chandra
- Create the artifact
- Reach Watchtower
- Cure the plague
We still have the Rock Ridge vow in the middle there, probably between 7 and 8. I’m open to the possibility that this could change, of course. A miss on a particularly important roll could lead to some entirely new threat entering the picture, or a dire outcome.
Return journey
Before we leave, we need to Resupply: weak hit, and Amara just feels like they’re moving too slowly. We lose some Momentum.
To Undertake a Journey, we’ll call it “Return to Chandra from Woodriver” and set the rank to Dangerous. Returning should be easier now that they know exactly where they’re going, and we want a little less story focus. For the first segment, we roll a weak hit. The pair find themselves at a perilous rapids once more.
Since they’re effectively foraging as they go, they’ll Resupply by fishing and get a miss. This far into the Tempest Hills, occasionally a silver bear wanders down. Most other bears aren’t aggressive, but this one is territorial and in any case Amara has somehow interrupted it. She’ll try to de-escalate with her expertise and thus Face Danger, yielding a weak hit. No attack ensues, but the pair continue to lose momentum as they relocate away from the river before trying again.
All our primary resource tracks (Health, Spirit, Supply) are at 1. Moving on risks running out of supply, so Amara will Resupply by foraging with another weak hit. Trading Momentum for Supply means living off the land is slow going.
The next roll on Undertake a Journey is a strong hit! The pair use their resources well, as they don’t want to stop to forage any more than needed, and our Wayfinder asset boosts Momentum.
New Arkash
They’ve reached the Hinterlands again and Amara will scout around to find a nearby settlement with Gather Information and Wayfinder, yielding a weak hit. Yes, but the community will have some sort of problem. Brynn finds a sign that indicates the town is named New Arkash, after some Old World community. But as they get closer, there’s an abandoned and looted caravan outside town. The Action / Theme oracle says Depart Greed: the town commandeered the caravan’s supplies.
 Photo by Jon Toney on Unsplash
Once they reach New Arkash, the locals give them nothing but suspicious glares. Amara carefully inquires about what they found outside the town, Gathering Information and we get a weak hit. Few people have any willingness to discuss it, but a small child tells her that “we needed it more and they wouldn’t share.” No indication of what happened to the people.
Amara and Brynn leave quietly and head back to the caravan to scavenge and see if anything was missed. On the Resupply, we roll a strong hit with an opportunity: they find a clue in the form of tracks to follow. As a trained Wayfinder, Amara can Gather Information on this and we roll a miss, meaning an unwelcome truth: the townspeople killed the caravaneers. New Arkash is, in effect, a raider settlement. After consulting together, our hunters decide to leave before suffering a similar fate.
But when they Undertake a Journey, we roll a miss. A couple of townspeople have followed them. They look scrawny, ill-equipped, and desperate. Did they ambush us (unlikely)? No, they’ve just stopped and threatened. It’s difficult to get the drop on a Warden, after all. Amara really doesn’t want to fight them, so instead she’ll try to Compel them to walk away with intimidation. We roll a weak hit - look, they just want some food. After some back and forth, Amara decides they’re not the individuals responsible for what happened to the caravan, so she’ll give them 1 Supply and move along.
Back on the road
Again we’ll roll Undertake a Journey but this time get a strong hit and trade Supply for Momentum. We’re close, back in the Deep Wilds region, and hoping to arrive very soon.
On the next Journey roll, we get a weak hit. The pair are moving as quickly as they can, using up their supplies. Why forage when we’re so close to Chandra’s hermitage?
Finally, they’re here. As they Reach Their Destination, we get a strong hit. We’ll take the Momentum and mark progress on the treatment vow. While Chandra prepares the ritual, Amara Makes Camp to recover a bit. This is a weak hit, and so she Focuses on the task at hand to gain Momentum.
This ritual has massive importance. If it goes poorly, we could suffer mystic backlash and, at that point, anything could happen, up to and including total failure. Chandra invokes the gods, the lands, and the spirits. She seems halfway in another world as she attempts to infuse the Guardian horn with iron forged among the stars themselves. Of course, Amara and Brynn must play their part in the process, which requires them to Face Danger with Courage. We roll a weak hit, so it succeeds but we have a new problem. The process used up all the iron. If we ever need to do this again or anything similar, we’ll have to get more starforged iron, so we’d best make use of this carefully! This hit allows us to mark progress on two vows where they intersect.
Completing the vows
As the hunters prepare to leave, Amara takes a moment to try to Reforge a Bond with Chandra. She approaches the older woman with gratitude and solidarity, and we roll a weak hit. Chandra expects something, actually: she wants to know the source of the iron. But Woodriver wanted to stay hidden! Amara weighs carefully whether this would be wrong, but Chandra used the iron for good purpose and is unlikely to be able to travel that far on her own. It might be a mistake, but Amara tells her of the tiny hidden community in Tempest Hills near a waterfall. The bond is struck.
What item was created? Chandra, a Mystic has created the Horn of Garran. This is a goat horn formed of arcane energy and starforged iron. All craftsmanship is of the highest quality. Infusing this particular horn with that iron represents the Ironlands themselves defending their life. Blow upon it with faith and courage to awaken the spirits and purge the land of corruption.
Before Amara and Brynn can get on the road, they’ll need to Resupply a bit and that’s a strong hit. Fate is with them, at least for now.
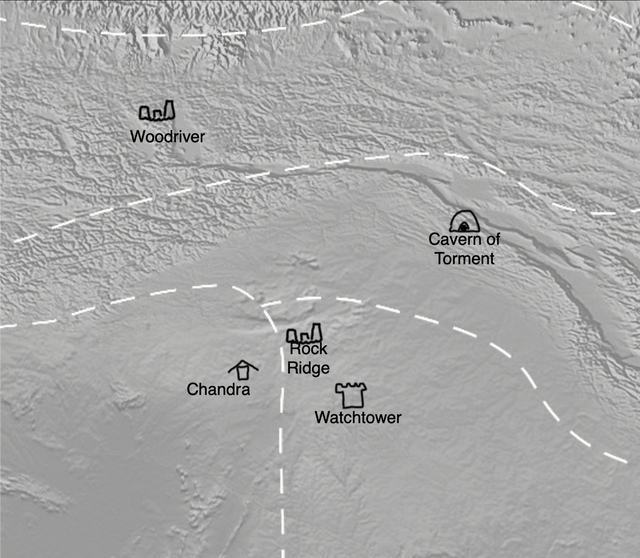
We set this up as a Troublesome Journey to Watchtower, with Rock Ridge as a waypoint, and roll a weak hit. Amara and Brynn come to a beautiful thicket. Here, they find no blight upon the land. A night under the stars, perhaps their last one together. This friendship has been forged in the fires of circumstance.
On the next segment of the Journey, we roll a miss but burn Momentum to change it to a weak hit. Nothing will hold them back at this point, and they reach Rock Ridge. Time to put the artifact to the test and blow the Horn of Garran. What if it doesn’t work??
Amara gathers together her courage and Faces Danger with Heart: weak hit. The power within drains her spirit, so she will Endure Stress with a weak hit and manages to continue. The power in that horn is not to be wielded lightly. With this, she Fulfills Her Vow to bring the cure to Rock Ridge but we roll a weak hit and get no XP on a Troublesome vow. Too many people have died here, giving them a Pyrrhic victory. Perhaps if they’d moved faster and arrived sooner, more lives could have been saved.
Regardless, she did fulfill it to the benefit of those who did survive, so she will Forge a Bond with the community of Rock Ridge. This also gives a weak hit. They want her Wardenship to include them, and of course she agrees to protect them if she can reach that title.
Amara has no time to spend here. She and Brynn say their goodbyes to one another with tears, and then Amara Undertakes a Journey alone back to Watchtower with a weak hit, using more Supply. That Maimed leg has troubled her almost since she left and she’s moving slowly on her own. But now she Reaches the Destination with a strong hit, carrying +1 forward to blow the Horn of Garran.
Just as before, using a powerful artifact here risks mystic backlash and her own spirit. She gathers her faith together to Face Danger and this is a weak hit. Once more, she must Endure Stress for the drain it puts upon her, and despite the chance that she could face desolation for doing so, we roll a strong hit and she carries her community’s pain with resilience.
The spirits of earth and life rise up, clearing the air, the plants, the animals, and the people. They can breathe again, and their flesh knits itself back together miraculously.
This leads to Fulfilling Another Vow, and we get a strong hit on this Formidable challenge. Amara gains 3 XP and we have saved Watchtower!
With this XP, she’ll Advance and take the Battle-Scarred asset (due to the Maimed debility she suffered from the wild boar). She has “stared down death before” and will have increased resiliency when Enduring Harm at 0 Health.
Honestly, some of those rolls had my heart beating as if I were reading a book or watching a film in which I was totally invested! Ironsworn has really started to hum for me. Next time, Amara will Sojourn a bit at home before trying to find a Warden or dealing with that demon.

