5 Parsecs From Home - Campaign Turn 18
Time to move on - we know where to go next in this quest to get the genetically engineered creature to safety. It’s going to be dangerous, though!
Travel Steps
Heading to the next world will cost us 5 credits. But the Acidic Angel is in good shape so we don’t worry too much about the danger.
While en route, however, Captain Ellen Swales gets injured while doing a routine maintenance task. She’ll need to spend the campaign turn resting to recover; also, her combat armor is damaged and will need repairs. (That advanced Pilot Training didn’t help us at all…)
We didn’t have any rivals remaining on the prior world, though there are a few on some of the worlds the crew visited earlier in the campaign. In any case, as we arrive on Mackensen III, we won’t have any immediate enemies (other than the ones that’ll show up during the mission regardless). No freelancer license required here, though they do have a vendetta system that means opponents we fight are more likely to become rivals.
World Steps
In addition to the fuel costs from before, Swales needs to spend another credit on regular upkeep. But the cargo hold carries a shipment worth 4 credits itself, leaving the crew at 16 credits. Although the captain is resting, she’s not technically in the Med Bay, so I decide she’s at least able to do a crew task on board.
Crew Tasks
- Ellen Swales: Repair
- She’s going to spend some time on the ship recovering but at least she can try to get her combat armor operational - and maybe look for that damned Fury Rifle.
- While she doesn’t actually get it operational, it’s not unrepairable - she’s just having trouble doing that while also recovering from her injury.
- Reyna Crowder: Explore
- While out seeing the sights again, she gets completely lost. Fortunately, she’s savvy enough to find her way back to the ship in time for the actual mission.
- Shurl Reeves: Trade
- While out at a merchant watering hole, she gets a hot tip (+1 Quest Rumor).
- Thornton Darby: Repair
- He’ll take a pass at trying to get the combat armor fixed for the captain, and he succeeds! When she’s back on her feet, she’ll be good to go.
- Saige Alden: Explore
- She had wanted to stay back on the previous world, Nivelle IV, but I spent the required story point. Besides, ultimately she’s going back to find Stroud Ogden, her former crew member and lover, right?
- But her bad mood about being out in a place she doesn’t really like gets her in a fight and we add a rival to the list.
- Robert Shelby: Trade
- He’s learning from Shurl and picks up some Trade Goods for a future world.
Equipment
Perhaps I should have remembered about that Nano-doc the ship carries the next time we have an injured crew member! Regardless, Crowder takes the new Dueling Pistol over her regular Handgun. The owner of that personal trinket we found on the last mission is still unknown, so no extra gear for us here.
Battle
The new rivals that Alden picks up don’t track us down, but at the same time we don’t want to go do that quest mission while we’re down a crew member, as it’s going to be fairly tough. So the crew will pick up a regular opportunity job.
- Deployment Conditions: Surprise encounter (the enemy can’t act in the first round)
- Notable Sights: Nothing special
- Objective: Patrol
- 3 random terrain features must be checked (with a crew member within 2”) to win.
- Holding the field also qualifies.
- Enemies: Criminal Elements (not elite!)
- An extra bounty of 2 credits is available if we take them out completely (hold the field).
- That said, they’re extra likely to become rivals.
- Raiders: The only thing better than making something valuable is stealing it from someone else.
- Scavengers: Roll twice on the Battlefield Finds table.
- A total of 8 enemies, including a Unique Individual.
- Hakshan Investigator: Odd, suited aliens that trek the galaxy in search of something vitally important to their species.
- We dealt with this one before back in Campaign Turn 12. What’s he after?
- Enemy AI: Aggressive (except the Hakshan, who’s Defensive)
- Profiles: 1 Lieutenant, 2 Specialists, 4 Grunts, and 1 Hakshan Investigator
- Lieutenant: Speed 4”, Combat +2, Toughness 3, Saving Throw 5+, Hand Laser, Blade
- Specialists: Speed 4”, Combat +1, Toughness 4, Power Claw, Blade
- Grunts: Speed 4”, Combat +1, Toughness 3, Infantry Laser, Blade
- Hakshan: Speed 5”, Combat +0, Toughness 4, 1 Luck, Plasma Rifle
- Weapons:
- Blade: Damage +1, Melee
- Hand Laser: Range 9”, Shots 1, Damage 0, Pistol (+1 to Brawling, +1 within 6”), Snap Shot (+1 within 6”)
- Infantry Laser: Range 30”, Shots 1, Damage 0, Snap Shot
- Plasma Rifle: Range 20”, Shots 2, Damage 1, Focused, Piercing (ignore Saving Throws), Overheat (1 less shot if fired in consecutive rounds)
- Power Claw: Damage 3, Melee, Clumsy (-1 Brawling if opponent has higher Speed), Piercing
This battle will use the non-minis combat resolution system, as I want to try out how it works when we need to scout for locations (objectives). From the Freelancer’s Handbook (FH):
The battlefield is considered to be an open, abstract space, filled with terrain for combatants to lurk behind.
Most of the time, you do not need to track the positioning of characters using this system. Each combatant is assumed to be moving fluidly throughout the battle space.
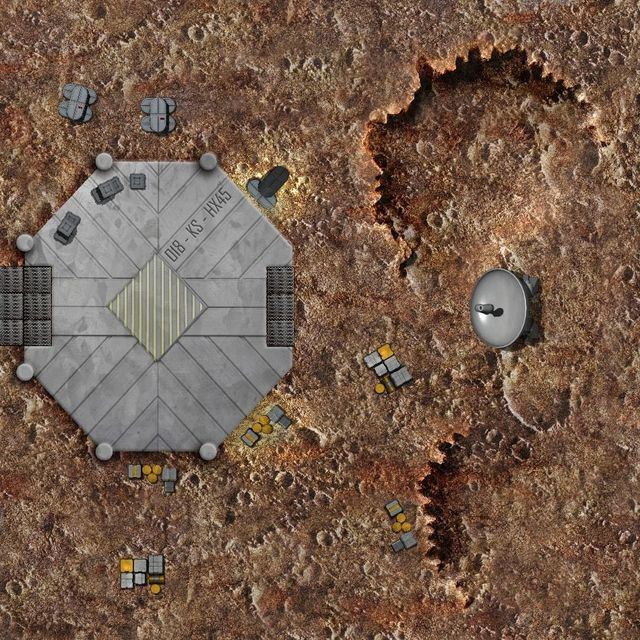
I envision this job happening in another remote industrial facility, with the crew checking on the security and safety of the area. The raiders show up at exactly the wrong time and we’ll try to hold the field for that extra bounty.
 Generated by ChatGPT
Round 1
The crew is the only side that will act this round due to the surprise encounter. In the no-minis system, each round has a Battle Flow Event, Initiative, and then Firefight (although the latter will be somewhat different this first round).
Battle Flow Event: Things get started when Reeves stumbles into one of the Specialists! They immediately get into a brawl. That’s 1d6+5=8 for Reeves versus 1d6+2=4 for the specialist, so Reeves wins the fight and takes out the enemy immediately. Nicely done!
Initiative: Since Swales sat this one out, Crowder (as 2IC) will act as the leader for this mission. She’ll act in this phase together with Darby and Alden, all of them trying to get Optimal Shots on the enemies as they’re approaching the facility. Crowder and Alden aren’t able to find one, but Darby sees a grunt in the distance. Due to the surprise encounter, the grunt won’t get to fire this round, and Darby gets a critical hit for a kill shot.
Firefight: Normally I’d select 3 enemies and have them exchange fire with the crew, but in this case, the surprise encounter means the randomly-selected raiders will not get to return fire against the similarly randomly-selected crew member. This will be the Specialist, a Grunt, and the Hakshan Investigator. The Hakshan shows up in Darby’s line of sight, and the alien would go down - but it’s got a Luck point to spend, so it looks up at the last possible moment before Darby fires and ducks back behind cover. Alden sees the Specialist and takes another shot, but hits the cover in front of the enemy instead. Crowder now sees the Grunt and fires her Needle Rifle, inflicting another casualty on the raiders.
With the enemy losing 3 out of 8 in the first round, this is probably going to be a quick battle; quicker still, as one of the grunts decides to run away.
Round 2
The enemy still has their Lieutenant, a Specialist, two Grunts, and the Hakshan Investigator.
Battle Flow Event: The facility has difficult sight lines, and with everyone moving around, it’s hard to find anyone. One less enemy will activate in the Firefight.
Initiative: It’s time to find those objectives; the crew has 3 suspected Locations they need to find. Crowder is looking for one but hasn’t found it yet.
Firefight: Only two enemies will go this round, both of them Grunts. One of the Grunts sees Alden; as they have identical weapon ranges (both carry Infantry Lasers with 30” Range), the crew member gets to fire first. Alden gets the drop and takes the grunt out with a quick shot. The other Grunt takes a shot at Shelby, but the rookie’s Deflector Field saves him from the hit. Shelby’s return shot misses.
At the end of the round, with another casualty suffered, the remaining enemies stiffen their backbones and continue their assault.
Round 3
There are now 4 enemies left: the Lieutenant, a Specialist, a Grunt, and the Hakshan Investigator.
Battle Flow Event: Again there’s an unexpected melee, this time involving the Lieutenant and Darby. The Lieutenant takes a swing with his blade and gets 1d6+4=5 (implying a natural 1), while Darby has longer reach with his Boarding Saber (Damage 2, Melee, Elegant) and gets 1d6+5=8, so there are two hits on the enemy leader. Armor stops the first one, but the second one gets through and takes the Lieutenant out of the fight.
Initiative: The crew is still looking for the objectives. Crowder finds one of them (1/3 Known), but Alden isn’t able to find another. Reeves moves up to the location and finishes that part of the patrol.
Firefight: All three enemies will get to act this round. The Specialist sees Reeves at the patrol location and rushes her, but she has a weapon with a snap shot and and hits the enemy first, stunning him. But that specialist is still able to get close enough to try to use his Power Claw, although she herself wields a Brutal Melee Weapon (Damage 2, Melee, Clumsy). The raider rolls 1d6+3=4 (another natural 1) and Reeves rolls 1d6+5=11 (a natural 6), so she inflicts 3 hits at +1 Damage each. Any one of them would have been enough to end the Specialist, and so this raider ends up being a splat on the floor. The remaining Grunt next screams at Alden, who killed his buddy, and she fires at him, taking him out as well. While all this is happening, the Hakshan Investigator has mutual LOS with Reeves, but she outranges them (30” Infantry Laser versus 20” Plasma Rifle) and hits the alien for a stun.
In return, the Hakshan fires back, missing entirely.
“Unique Individuals are Fearless and will not be affected by Morale checks.” (5PH p. 105)
Round 4
There’s only one enemy left, the Hakshan Investigator, and the crew has already found one of the three objectives.
Battle Flow Event: The Hakshan Investigator is far enough away (and stunned) that they’re all separated; there’s no melee this round.
Initiative: Scouting for the locations, Crowder finds one and orders Shelby to move up to it (2/3 secured). Darby finds the other one but they can’t get to it yet.
Firefight: The Hakshan is still up but won’t be able to take an Aim action this round. Instead, they target Crowder and have better range with the Plasma Rifle than her Needle Rifle (18”). But their weapon is overheating and they only get 1 shot instead of the usual 2, which misses. Crowder returns fire and misses as well.
(Note: the stun should not have continued into this round, but since the enemy didn’t roll a 1, the lack of aiming did not matter.)
Round 5
The crew has found 2 of the 3 objectives and the Hakshan Investigator is the only enemy left.
Battle Flow Event: The Hakshan is on the other side of a kill zone; all gunfire this round takes place at 12” range. Any weapons that can’t reach 12” can’t fire.
Initiative: Moving up to the last known location, Crowder wins the battle. They want to hold the field, though, so the crew needs to take out this Hakshan Investigator.
Firefight: The Hakshan gets into it with Shelby, but the alien’s plasma rifle only hits the cover in front of our rookie. Shelby hits the enemy with his Blast Rifle but can’t take them down.
Round 6
While they’ve finished their patrol, they want the bounties on this raider crew and will opt to continue to fight rather than exfiltrate. That said, this is the most dangerous member of that enemy squad.
Battle Flow Event: The Hakshan has moved slightly, but they’re across open ground. Anyone attempting to enter a brawl will count as in the open if they’re fired upon, so none of the crew will do that.
Initiative: Only Crowder is fast enough to try to get an Optimal Shot on the enemy, and they’ll get into the firefight now. That’s three hits with a Needle Rifle (due to a critical), which knocks the alien unconscious.
The crew of the Acidic Angel has won the objective and held the field.
Post-Battle Sequence
These raiders are unhappy and become rivals for the crew, swearing a vendetta against them. That said, the crew gets a bounty of 2 credits for taking them out completely, plus their regular 3 credits in bounty and payment for the job, getting them up to 21 credits. They also find another personal trinket, which they’ll hang onto for now. (The second Battlefield Find turns up not a damn thing!) However, in regular loot, they find a cache of 3 Dazzle grenades.
No one took any injuries, so everybody who participated gets 3 XP, plus 1 extra for Reeves inflicting the first casualty. Crowder also gets 1 for taking out the Unique Individual. Crowder takes +1 Savvy, but nobody else gets an ability increase.
Just in case we don’t find Swales’ lost Fury Rifle, she spends 3 credits on a Military Weapon and ends up with a Boarding Saber. That’s not necessarily a good replacement, but at least this way she has a (short) range weapon in her Dueling Pistol and a melee weapon in the Saber. If she doesn’t get the Fury Rifle back, she might make another purchase next time.
While the crew was undertaking routine maintenance on the Acidic Angel, though, somebody knocked the gravitational adjuster out of alignment and the ship takes 1 point of hull damage. We’ll fix that next campaign turn.
Oh, hey, Swales found her Fury Rifle after all! But Saige Alden is really unhappy about how her life is going and is overtaken by a deep feeling of melancholy and despair. She won’t earn any XP next campaign turn. Honestly, she’s missing Stroud and thinking about calling this all quits.

