5 Parsecs From Home - Campaign Turn 9
This might be our last turn here on the gas giant of Elyria and its flying cities, at least for now. The number of rivals has gotten high, as is the risk of war. But at the same time, the credits have been good, so maybe not?
World Steps
Overhead remains low, with minimal upkeep and no debt or repairs. No one is in Sick Bay, either.
Crew Tasks
We have a quest to pursue, so patrons are not particularly important right now. If Weyland-Yutani wants to offer us a job in the future, though, we’ll consider taking it. Also, the ship’s cargo hold is getting full of broken stuff we want to try to fix: a Duplicator, Flex-Armor, a Time Distorter, a Grapple Launcher, a Hot-Shot Pack, and a Blast Rifle. I think the Blast Rifle is the most important to fix.
- Ellen Swales: Repair
- She’ll work on Darby’s Blast Rifle, using some remaining Spare Parts in the ship’s hold.
- Success! He’s got a weapon again, good as new.
- Reyna Crowder: Repair
- While not as Savvy as Swales, she’ll try to fix the Hot-Shot Pack.
- Unfortunately, it turns out the item is beyond fixing, and the spare parts are wasted.
- That’s a disappointment as that would have been a decent weapon mod for Darby or Notley.
- Shurl Reeves: Trade
- She runs across an odd device and is unsure of its function or value. Not worth the effort or the cost right now.
- Thornton Darby: Trade
- While working the markets, he gets a hot tip (Quest Rumor) that will help Swales track down the information she’s looking for.
- Mark Notley: Decoy
- Saige Alden: Decoy
Swales really wants to look into what happened with her old crew and the transport job that got them so much attention, so that will be the focus this turn.
Battle Setup
The work that Notley and Alden did paid off, and our rivals are left chasing their tails. The crew can focus on the quest.
- Deployment Conditions: Caught off guard - the crew will all act in the Slow Actions phase during the first round.
- Notable Sights: Shiny bits (worth 1 credit if we can get to them)
- Objective: Defend
- To win, we need to Hold the Field (drive off the enemy).
- This will affect the opposing AI’s behavior, making it more likely to be Aggressive.
- It also slightly increases the enemy’s numbers.
- Enemy: Criminal Elements
- No extra bounty
- Brat Gang: Upper class fools who have decided to shoot up the neighborhood for fun.
- Panic 1-3, Speed 5”, Combat +0, Toughness 4, AI Aggressive
- Careless: We’re at +1 to Seize the Initiative
- Armored (they have a 6+ Saving Throw)
- 1 Lieutenant (+1 Combat) with Hand Laser and Blade
- 2 Specialists with Marksman Rifles
- 4 Brats with Hand Lasers
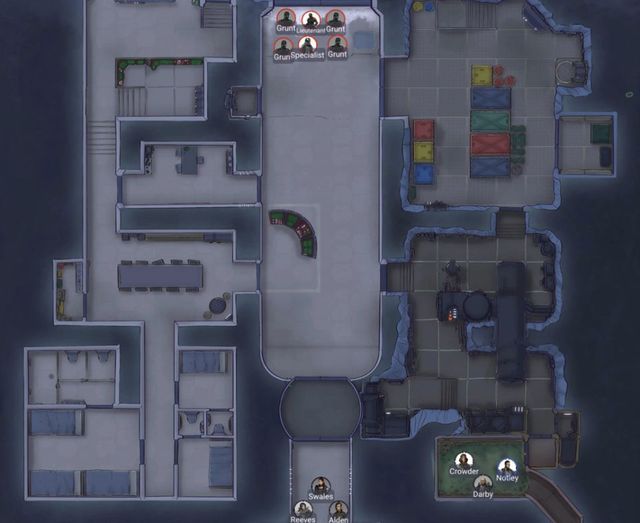
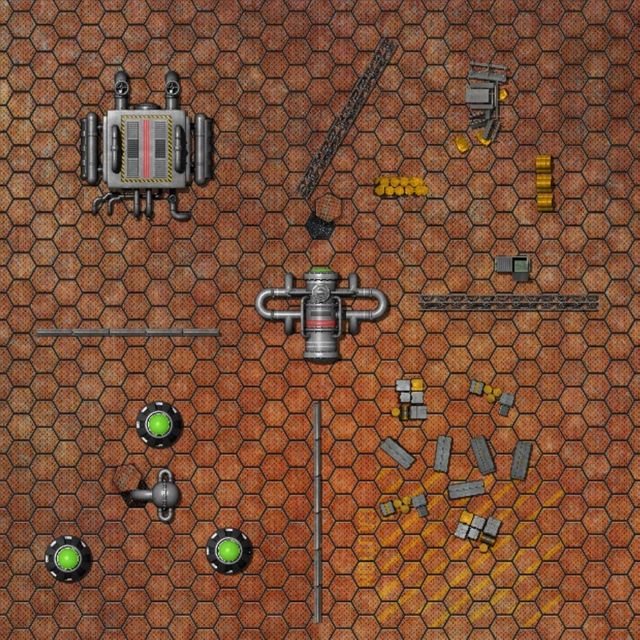
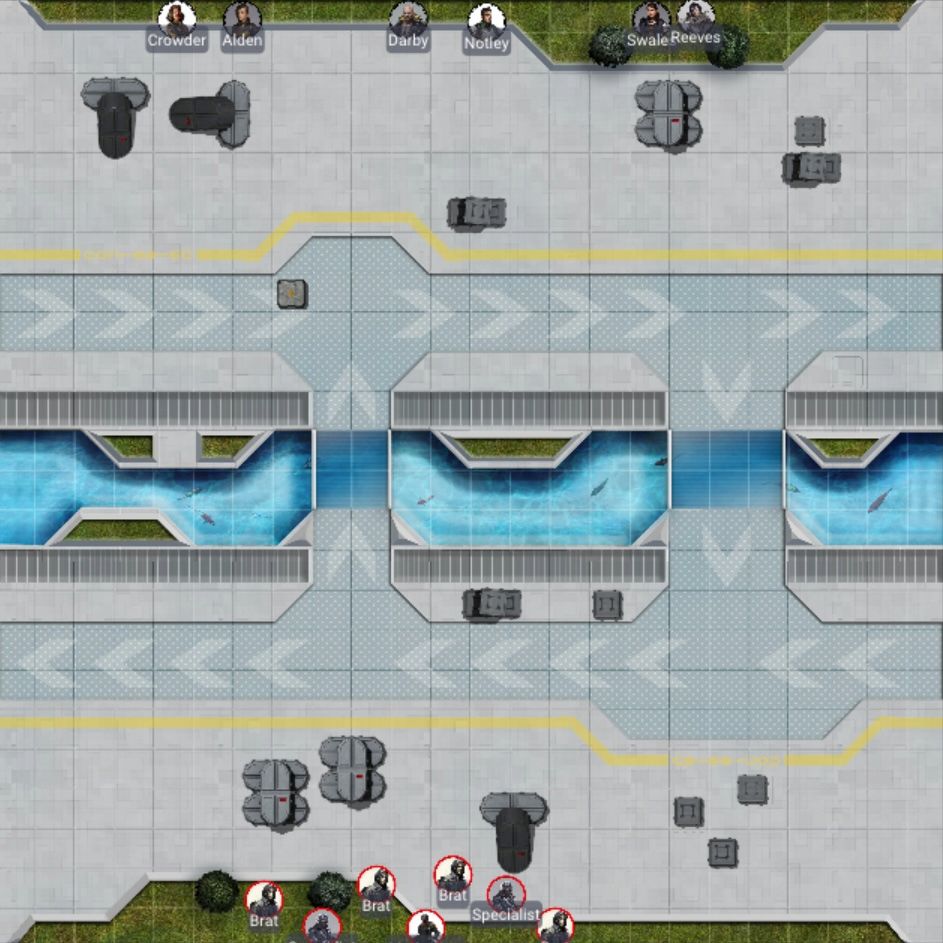
I think these are the most enemies we’ve faced yet. As for the map, I think it needs to be something fairly nice, as we’re facing well-heeled opponents, and Loke BattleMats has just the thing: a Habitat Concourse. As usual, I’ll throw in a bit more terrain to keep it a bit interesting, mostly some tech crates. The bench areas that line the small ponds provide cover, and stacked crates block line of sight but can also be climbed to provide a height advantage. The shiny bits are 7” northeast of the center of the map in a different type of crate.
Now that I’ve set up the map, I’ll roll for deployment edges: the crew deploys on the northern edge, meaning the gang deploys on the south. As usual, I’ll set the crew up in pairs, with the more heavily-armored folks towards the center. The plan is to stay behind cover as much as possible and pick them off as they approach, then deal with whomever gets to us in crossfire. The crew won’t go after the shiny bits directly, since we need to hold the field anyway in order to win.
Rules of Engagement
- All Laser, Beam, or Blast weapons are -1 to Hit at ranges exceeding 9”.
- Aggressive enemies set up in one cluster with 1” between each figure.
- Aggressive enemies will not Aim.
- Aggressive enemies with opponents in sight will advance at least half a move towards them, attempting to remain in Cover if possible.
- Enemies that are unable to see any opposition, or which are within 12”, will advance as fast as possible towards the nearest opponent, attempting to enter into a Brawl against opponents with equal or lower Combat Skill.
- Heavy weapon figures will not move if they have a Line of Sight to a target.
Round 1
I’ve been forgetting to roll to Seize the Initiative! As it turns out, the enemy’s carelessness does let everybody move or shoot once before the round really begins.
Due to the deployment conditions, the crew will all act in the Slow Actions phase during the first round. Somehow we seized the initiative but were caught off guard anyway?
The gang activates next. All four regular Brats dash forward, staying behind cover more or less. The Specialists have line of sight; one takes a shot at Darby and the other at Reeves, but both miss. Their Lieutenant stays behind the regulars.
In the Slow Actions phase, the crew aims and volleys (except Alden who doesn’t have an enemy in range of her Shotgun). Crowder, Darby, Notley, and Reeves all miss, but Swales drops her target in their tracks.
At the end of the round, none of the gang panics and bails.
Round 2
Only one crew member can go in the Quick Actions phase this time; Reeves aims and squeezes off a shot, which hits her target but only stuns them due to their armor.
When the gang activates, the reflective dust keeps the Lieutenant and regular Brats from being able to hit the crew. The Specialists both shoot at Reeves; one gets a lucky hit and she needs to activate a Stim-pack to avoid becoming a casualty.
The other crew members activate now. Alden shifts slightly so she has an enemy in range, but her Shotgun still misses. Crowder and Darby both aim and fire, but miss. Notley takes a shot and hits, taking out a Brat.
One of the Specialists panics and runs away at the end of the round.
Round 3
Reeves recovers from her stun and misses her shot. Swales takes a deep breath, aims, and still misses the Lieutenant.
The two remaining Brats jump into the pond as they approach the crew firing Hand Lasers, but those shots all miss. In fact, the Lieutenant does the same, and his shot also misses. The other Specialist takes another sniper shot at Reeves, but misses.
Darby and Notley miss the Lieutenant despite aiming. Alden’s Shotgun can’t take down a Brat, but Crowder’s Needle Rifle does.
This casualty does not send any gangers running.
Round 4
Half of the crew will activate in this Quick Actions phase. First, Darby aims before sending a blast at the Lieutenant, which unfortunately doesn’t connect; same with Notley. Then Swales tries, but only hits the cover in front of her target.
These aggressive gangers aren’t going to sit back and get picked off; they’re not that smart. The regular Brat hurdles a bench and leaps out of the water, dripping everywhere, but getting to a flanking position on Notley so he can fire without cover. The armor doesn’t take the hit, but Notley is still only stunned and knocked back on his feet. The Lieutenant does the same, but going around to get a clear shot on Darby, with the same result.
Finally, Alden has a good shot on the Lieutenant with her Shotgun, but at this distance the shot only stuns him and knocks him back into a bench. Crowder’s Needle Rifle doesn’t even hit him. Reeves aims and drops the Brat heading towards Notley.
Lieutenants don’t panic, so that’s not a consideration here.
Round 5
Alden activates in this Quick Actions phase and tries again with a Shotgun blast, which would apply two Stuns. However, since the Lieutenant is already stunned, he’s taken out of the fight completely, ending the battle.
Post-Battle Sequence
This gang of brats are pretty upset with us and will become rivals at least as long as we’re on this planet.
In terms of the quest, Swales has made some progress and gained additional information. Whatever they were transporting had value beyond what the crew itself had been told; were they just smuggling something? It had to have been legal, though, or at least legal-ish, since they were recognized officially for their work. Perhaps it’s related to the war that’s brewing, or just to the rich folks here on Elyria.
Between loot and bounties, the Weekenders have earned another 6 credits plus 1 for the shiny bits (somebody left some money sitting around). They also find another 1 credit of debris they sell on the scrap market and a Military Rifle.
As before, this local gang isn’t an invasion threat and no one is injured. Everyone gets 4 XP, and Ellen Swales gets an extra for taking down a target first. She gets an extra 2” of Speed. Reyna Crowder gets 1” more Speed while Shurl Reeves gets an extra +1 to her Combat. Thornton Darby takes +1 to Savvy because there’s so much broken equipment lying around and Mark Notley gets +1 to his Toughness. Saige Alden gets another 1” Speed. Now everybody has an even number for that, which helps with calculating dashes!
Since the crew is considering leaving Elyria, Swales doesn’t want to buy any more personal equipment. Instead, she spends 23 credits plus the looted Starship Part to upgrade the Acidic Angel’s Sick Bay to a Medical Bay, allowing one recovering crew member to mark off 2 campaign turns of recovery time instead of 1.
However, the war has drawn close enough that the Unity government says no ships can leave. For the next two turns, we’re stuck here after all. In conversation with friends about it all, Darby turns out to know someone who knows someone and picks up another patron.