The Doomed - Session 3
Continuing the wargame campaign, the severity of the doom has started to get to the warband:
Bleak Outlook: There really doesn’t seem to be any point to all this. Any QL4+ units you hire for this battle are treated as QL5+ but cost 1 point less than normal.
As we’ll see, this does in fact affect one of our members.
Warband
25 points, +1 for Wigg due to her Bleak Outlook, for 26 total.
- Kullax the Slayer (Fierce, QL3) [5 points]
- Missing in action at the end of the last firefight, his loyal team pushes to find him before something worse happens.
- Massacre: At the end of his turn, any allies that can see a downed enemy make a free move or fight.
- Signal: At the end of his turn, a Readied Ally he can see activates and carries out their turn
- Fusion Gun (R3x1 - Bane: Target saves as if it had QL5)
- Blade (M2x1)
- Wigg the Predator (Precise, QL5) [6 points]
- What’s the point of new prey if we’re all doomed anyway?
- Oblivion: Bleak Outlook (treat as QL5 but costs 1 less point)
- Shardcaster (R3x1)
- Blade (M2x1)
- Hodug the Oathbound (Tough, QL5) [6 points]
- A fighter sworn to protect his leader
- Defender: The unit makes saves at QL3 if he can see the Leader
- Hunting Spear (M1x2 - Lethal: Treat Shock Rolls of 7 as Taken Out)
- Pistol (R1x1 - Sidearm: At the end of his Turn, he can make a free attack with this weapon. A unit may make only one Sidearm attack per turn)
- Jhish the Blooded (Nimble, QL5) [6 points]
- Fresh and eager to prove herself
- Frenzy: At the end of her turn, all enemies in melee with her take 1 Damage
- Reaper Blade (M1x2 - Make a free action when she takes out an enemy with this weapon)
- Link: An ally she can see may perform a free move
- Barris the Spotter (QL5) [3 points]
- Vicious harbingers of incoming death
- Sensor: At the end of the Spotter’s turn, a Readied Ally in LOS can make a free ranged attack at an enemy the Spotter can see
- Piercer (R1x2)
Scenario Setup
Horror
We’re fighting automatons this time, which the company left behind after their rapid expansion and abandonment of the planet.
Crusade Machine (Precise, QL3)
- Put to work here since the Company first landed.
- Shredder (Ranged Weapon - Fires 2 shots for each Nexus still active, each causing 1 Damage)
- Impacter (M1x6)
- Lumbering: This unit must roll to move, even on its first move.
- Restless: The Machine never exhausts itself. At the end of its turn, if it is the only Readied unit on the board, end the Round.
Even the Minions are automaton followers:
Dormant Flayers (QL4)
- The mechanical warriors of the Company’s legions.
- Flaying Beam (R2x2 - x2 Damage on a 6)
- Relentless: The Flayer can Attack as normal while it is Down.
- Dormant: This unit only performs 1 Action per turn.
The Machine’s active shield system protects it, but also acts as a restraint of sorts.
The Nexuses move with the Machine and can be targeted individually (QL3). As they are destroyed, the Machine loses Precise and Lumbering, then gains Nimble. The responses at the end of the rounds will let the minions do more things, as they are relatively dormant otherwise.
Conflict
A lone warrior is looking to take out any warband leaders they can find. Their single-minded focus may be their undoing.
This conflict recommends dense terrain with lots of hiding spots. We’ll keep the Vigilante off the board at the start of the game, then deploy them from any point on a board edge.
Vigilante (Nimble, QL3)
- A singular avenger seeks to behead the warbands.
- Stranglegun (R1x3 - If the target is Downed by this Attack, they immediately suffer d6 Melee Damage)
- Hidden Blade (M2x1 - x2 Damage when Attacking directly after Moving)
- The Vigilante acts as an Unbound unit, treating only Warband Leaders as their Enemy. If no Leaders are on the board, they treat all other units as Enemies instead. Horrors and Minions treat the Vigilante as normal (i.e. an Enemy) Warband member.
Our objective is to Take Out the Vigilante.
Map
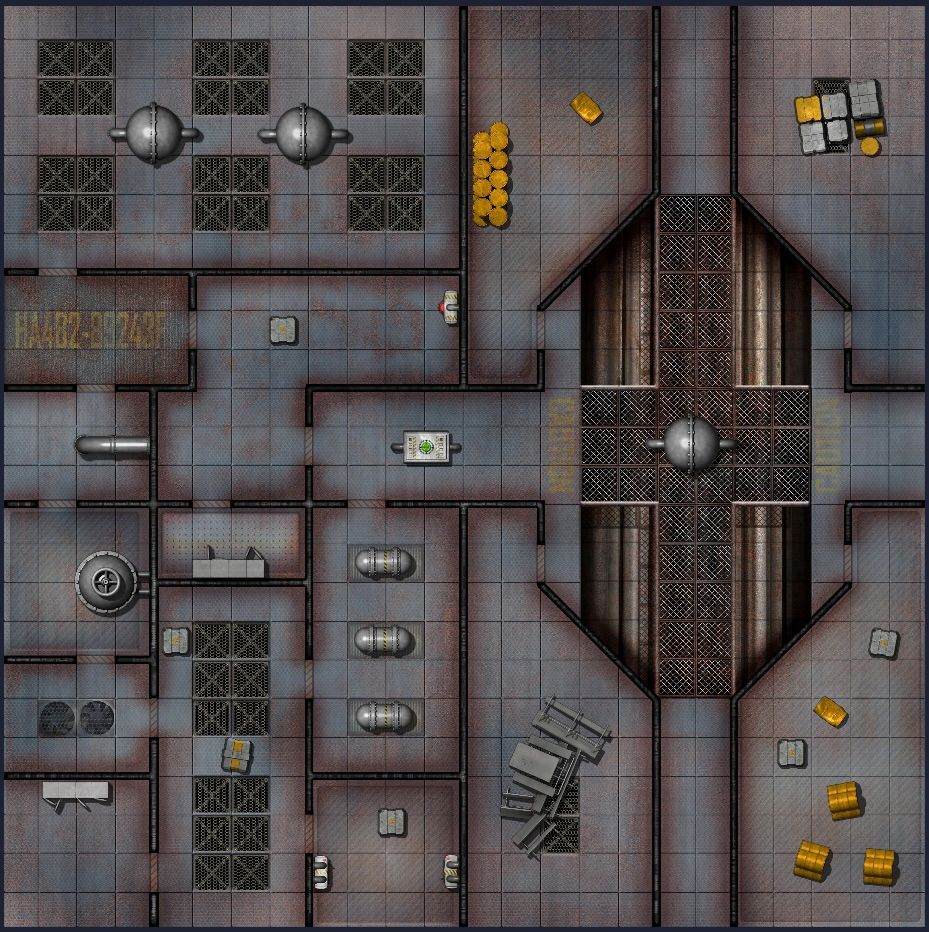
This map is based on the Industrial Encounter Map from Loke, plus sci-fi decor from Gabriel Pickard, whose work I used a great deal when I played D&D 5e on Roll20.
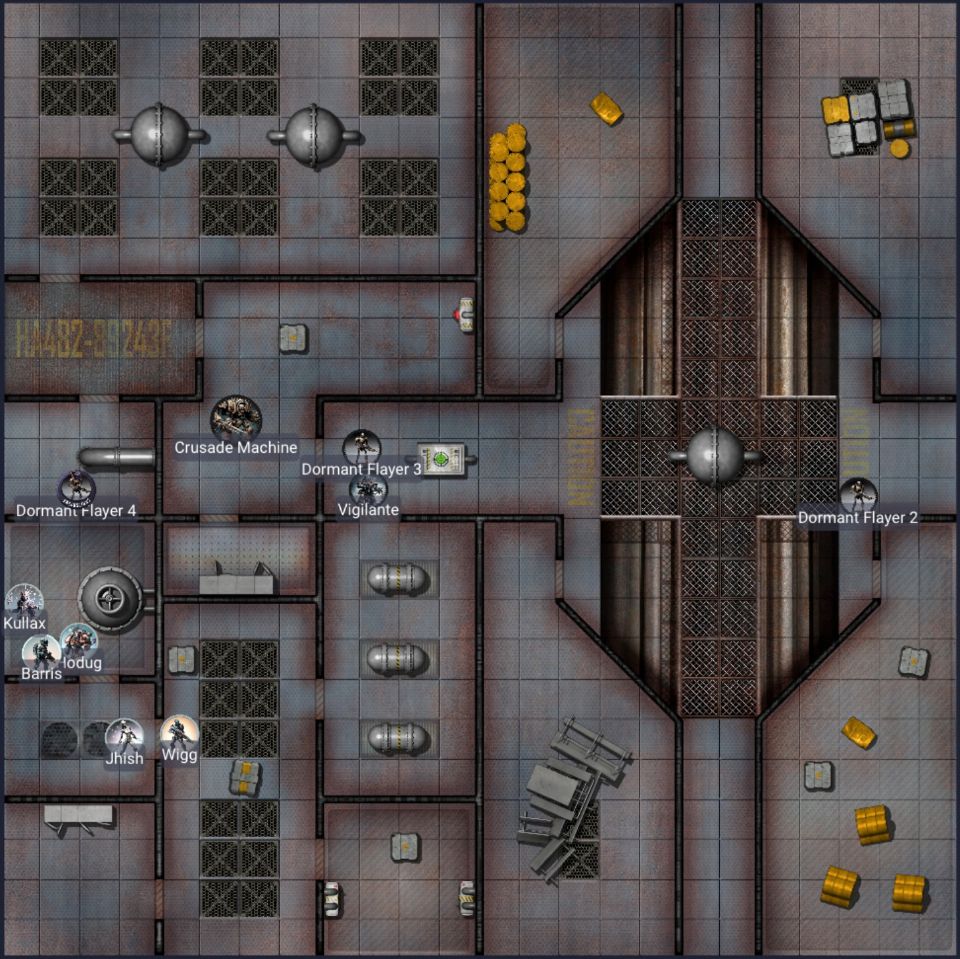
Playing the scenario
Time to dig into it! The Crusade Machine deploys in the center of the board, while the Dormant Flayers are spaced evenly in the center of the four quarters.
The Exile Bands enter an old industrial facility looking for Kullax, who has been missing since the disastrous fight with the Warped Hunters. They don’t know that another threat seeks their leader as well, but they do expect to find some leftover Company automatons. They are not disappointed.
Round 1
Wigg deploys first, entering through a hallway on the southwest edge. Seeing an enemy, he moves behind a crate and shoots at Flayer 1 with a Shardcaster (R3x1), hitting it for 2 damage. Flayer 1 goes down, but shoots back as it does so and deals 2 damage. Wigg takes a second shot as he goes down ((this is actually a rules error; they should not have been able to do a second ranged attack this turn)). Flayer 1 is Taken Out and Wigg is Downed.
Dormant Flayer 2 activates in a southeast room and starts to move out, towards the nearest non-visible enemy (just Wigg so far).
Kullax activates next, and I roll randomly to see where he’ll deploy (with the caveat that he will be out of sight). This puts him a in room near the center and he’s able to move into the hallway with Wigg.
“Thought you’d never get out here,” Kullax says. Wigg grunts in response. “Does it even matter?”
Dormant Flayer 3 deploys in the northeast sector, moving down to a walkway intersection behind some old tank of chemicals (possibly empty, possibly dangerous).
Barris, who recently joined as a scout, deploys in the same hallway where Wigg entered. He moves ahead into a western adjoining room to keep an eye on whatever may be headed their way.
The final Dormant Flayer 4 moves to doorway in NW room.
Hodug deploys into this same hallway and moves to flank Barris, intending to serve as a human shield in front of his commander. Given his injured state, he is putting his life on the line more than usual.
Last, the Crusade Machine activates in the center as it detects organic lifeforms moving through the facility. Its Lumbering form can only make one successful move, however. Due to its Restless ability, the round ends before we can bring on any other units.
((I forgot to roll an end of round response for the Flayers.))
Round 2
Jhish deploys from random table edge, which turns out to be the south one like the rest of the warband. Since she was Lost, however, I decide she doesn’t get to deploy from the same hallway as the rest of the warband. Instead, she deploys from a nearby locker room (rolled randomly). Regardless, she catches up to Barris and Hodug.
Dormant Flayer 4 moves south towards Barris, but still is not in line-of-sight (LOS).
The rust in its joints and low battery prevent the Flayer from moving quickly, but it is relentless regardless as it weaves through the old machinery and chemical processing equipment.
Barris proceeds cautiously into another room, this one with a large valve that provides some amount of cover and concealment.
The Crusade Machine speeds up slightly and reaches another room, heading towards the nearest organic lifeform.
Kullax moves to flank Jhish and Hodug. He’s found some new equipment and is eager to try it out on whatever they can hear headed their way.
Dormant Flayer 3 continues across the walkways, reaching the center of the board.
Hodug comes up to flank Barris and watch the door on north side of room, on the other side of the valve. He wants to hold shot for anyone coming through; there’s no rule for this (intentionally?) but I decide he’ll need to Roll to do so, and he fails.
Dormant Flayer 2 reaches the central room, speeding up to reach a comrade.
Wigg moves to a doorway near Jhish. The space is getting cramped but they keep their weapons at the ready as they can hear mechanical footsteps approaching with increasing speed.
At this point, the Vigilante deploys from north table edge, near where Flayer 3 started. He moves to that central intersection, paying no mind to the automatons ahead of him.
At the end of the Round, all Flayers make a Free Move. Flayer 3 moves next to the Vigilante while the other two continue their advances.
Round 3
Barris moves slightly to get LOS on the approaching Flayer 4. He shoots with his Piercer (R1x2), but misses.
Flayer 3 cannot Shoot while touching an enemy ((and I forgot about unarmed attacks)) so it just cycles uselessly.
Kullax passes the loyal Hodug then to the western table edge to get a shot on Flayer 4 with his Fusion Gun, hitting it for 3 damage. Flayer 4 is Wounded by the intense energy, and as Last Gasp (Free Action) it fires a beam back in Kullax’s direction, hitting the wall harmlessly.
The Crusade Machine moves to the room on west with yellow floor lettering, preparing to unleash its weaponry next round.
Hodug runs past Kullax to get into a melee with Flayer 4. Despite the automaton laying on the ground, Hodug’s spear misses.
The Vigilante continues his hunt, catching up to the Crusade Machine. Squeezing past its bulk will be a challenge.
Jhish also enters the valve room and reaches the doorway next to Hodug. Her Link ability gives a free move to Hodug, who moves back out of the doorway.
Flayer 2 is now adjacent to Flayer 3.
Wigg flanks Barris in what has become a very crowded area.
At the end of the Round, a random Flayer performs 2 Free Actions. Flayer 2 moves, then shoots its Flaying Beam at Vigilante. The avenger saves against both damage, though.
Round 4
Kullax still has a shot at Flayer 4 and hits it for 3 damage. He Takes it Out! He then rolls to set up an ambush for anyone coming through door, and succeeds ((which I promptly forget anyway; maybe this is why the game doesn’t explicitly allow it)).
The Crusade Machine moves to a doorway north of the pipe, but its Lumbering chassis cannot move further this turn.
Wigg shifts slightly to get LOS on the Crusade Machine. They fire with their Shardcaster at the partially concealed horror, hitting for 2 damage (on Nexus 1). The Nexus saves against damage, however, and Wigg is unable to fall back out of the line of fire.
Flayer 2 once again shoots at the Vigilante, and despite scoring a hit, results in no damage.
Barris can also see the Crusade Machine and shoots (at a Nexus) with his Piercer, but misses. Not wanting to be shredded by its blades, he falls back slightly.
Flayer 3 moves behind Flayer 2.
Jhish nimbly runs up to Crusade Machine, attacking with her Reaper Blade but is unable to damage it. At end of her turn, her Frenzy does 1 damage to Crusade Machine and all three Nexuses. This destroys a Nexus and the Machine loses Precise. ((She should have had a free action because of Reaper Blade’s special ability, but I forgot this as well, in a recurring theme.))
The Vigilante cannot move past the Crusade Machine because of Jhish, but has eyes only for Kullax and thus does not attack anyone.
Hodug stands in the doorway to defend Kullax. When he shoots at the Crusade Machine with his sidearm, he hits Jhish instead. Fortunately, she saves against the damage.
At the end of the round, a random Flayer performs 3 Free Actions. Flayer 3 moves to the doorway, takes a shot on the Vigilante and hitting for 2 damage (which Vigilante saves against once more), then moves up next to the Vigilante.
Round 5
Jhish continues her bladed assault against the Crusade Machine, failing twice. Due to her Link, Hodug is able to make a free move up. At end of her turn, she enters a Frenzy to do 1 damage to both remaining Nexuses and the horror, but all save against damage.
In response, the Crusade Machine tries to slam Jhish with its incredibly powerful Impacter), fortunately missing twice.
((The chokepoint here has really become a problem.))
Hodug tries to shoot at the Crusade Machine with his pistol (R1x1) through partial concealment, but misses. Fortunately, this time he doesn’t hit Jhish!
Flayer 2 moves up behind Flayer 3.
Barris shifts his position near the doorway, then gives a shot with Sensor to Kullax (albeit with partial concealment). The leader fires his Fusion Gun at the lumbering horror and hits for 2 damage, wounding it. As the Crusade Machine goes down, it gets a Free Attack and shoots Kullax with its Shredder (R4x1), hitting him for 3 damage. Kullax is Taken Out, giving the Machine an opportunity to attack Jhish with its Impacter. Jhish is wounded, but gets a similar opportunity to try to slice into the automaton with her Reaper Blade. Unfortunately, she is unable to damage it.
Flayer 3 fires a beam at Jhish but misses despite her wounded form on the ground.
Wigg attempts to Recover Kullax; however, they fail to get the leader back on his feet. They raise their weapon and make a shot on the Crusade Machine, but it saves against the damage and shrugs off the shards.
The Vigilante cannot move past the Crusade Machine and the various warband members bunched up in front of the doorway.
The round ends with a random Flayer performing 3 Free Actions. Flayer 2 shoots at the Vigilante (R2x2), this time wounding him. He tries to crawl away but can’t find a place to move to.
Round 6
Hodug, cursing himself at seeing his fellow fighters go down, unsuccessfully attempts to Recover Jhish. Looking up, he shoots at a Nexus with his Pistol and destroys it. But the Nexuses were also holding the Machine back, and it now loses Lumbering.
Flayer 2 fires at the Vigilante through partial concealment and misses.
Jhish struggles back to her feet and, in her second attack on the remaining Nexus with her Reaper Blade, destroys it. As a result, the Crusade Machine gains Nimble but is also vulnerable to being Taken Out. That gives Jhish an opportunity to Frenzy at the end of her turn, doing 1 damage to the Crusade Machine and it is Taken Out! The remaining Dormant Flayers flee.
The Vigilante tries to get back up but fails.
Barris and Wigg both ((invalidly)) try to Recover Kullax, but fail ((which is good because he was already Taken Out)).
Round 7
Jhish strides over to Vigilante, bringing her Reaper Blade down on him and ending that threat.
Aftermath
The only casualty was Kullax, who ended up Gruesomely Scarred.
Rewards
+3 Renown for taking out all Nexuses and the Horror (Crusade Machine), total 28. +2 Prestige for taking out the Horror and winning the Conflict, total 3 (of 10 needed to complete the campaign).
From the Horror, we get:
- Impacter (M1x6 - Cannot be used on the last Action of your Turn or as a Free Action) [3 points, Max 1]
- Active Shields - This unit cannot be Attacked in the first Round [2 points, Max 1]
- Awoken Flayer (QL4)
- Flaying Beam (R2x2 - x2 Damage on a 6)
- Relentless: The Flayer can Attack as normal while it is Down.
- [6 points, Max 1]
The Warband also gains the following from winning the conflict with the Vigilante:
- Stranglegun (R1x3 - If the target is Downed by this Attack, they immediately suffer d6 Melee Damage) [3 points, Max 1]
- Hidden Blade (M2x1 - x2 Damage when Attacking directly after Moving) [2 points, Max 1]
- Defender: Save at QL3 if the unit can see the Leader [1 point]
Leader Ambitions
Kullax only gets progress on his trophies; the others have not been met yet.
- Trophies: 2/3 (Devourer, Dormant Flayer)
- Legend: 2/5 Nexuses destroyed.
Lessons Learned
I have yet to remember that Kullax has a Massacre ability! Similarly, he did not use his Signal, nor did Jhish make use of the Reaper Blade’s free action. While I’m getting better at remembering statuses, I still sometimes forget. This impacted the battle in multiple ways, but perhaps it evened out in the end.
I may have overcompensated with the terrain, as everything ended up in a single chokepoint. Too dense, and so that part wasn’t as much fun! Building the map was good, though, and I’m looking forward to the next scenario.

